
How to Purge Your Facebook Data on Android

How to Purge Your Facebook Data on Android
Facebook can be a major time-waster. One way to get control of your time is by using the digital wellbeing tools available on Android to set timers for the Facebook app. But if that’s not working, another option is deleting your Facebook account for good.
Here’s how to delete your Facebook account on your Android phone.
What’s the Difference Between Deactivating and Deleting Your Facebook Account?
Facebook gives you two options if you want to take time off the platform. You can either deactivate your account or delete it. These are not the same. Deactivating your Facebook account means you can still log in whenever you wish.
If you deactivate your account, people won’t be able to find you on Facebook since your profile will be disabled. Also, Facebook will deactivate any of your Pages if you are the only administrator.
Additionally, although your name and photo will be removed, not all information will be hidden. For instance, messages you’ve sent and your name in a person’s Friends list will still be visible. Furthermore, your personal data like posts, photos, and videos will remain intact.
On the other hand, account deletion is when you wish to leave Facebook for good. Instead of undergoing the painful process ofdeleting your Facebook posts and other data, account deletion does that in a single step. But, if you change your mind later and wish to come back, you’ll have to create a new account. Plus, if you run a page as the sole administrator, it will also be deleted.
What to Do Before Deleting Your Facebook Account
Deleting your Facebook account will purge your profile from the company’s servers for good. With that in mind, you need to do several things first before tapping that Delete button. The first thing you should do is download your data.
If you’ve frequently been using Facebook for an extended period, you probably have lots of personal data on the platform like messages, Stories, photos, videos, and more. The good news is that you candownload your entire Facebook history using the platform’s data download tool.
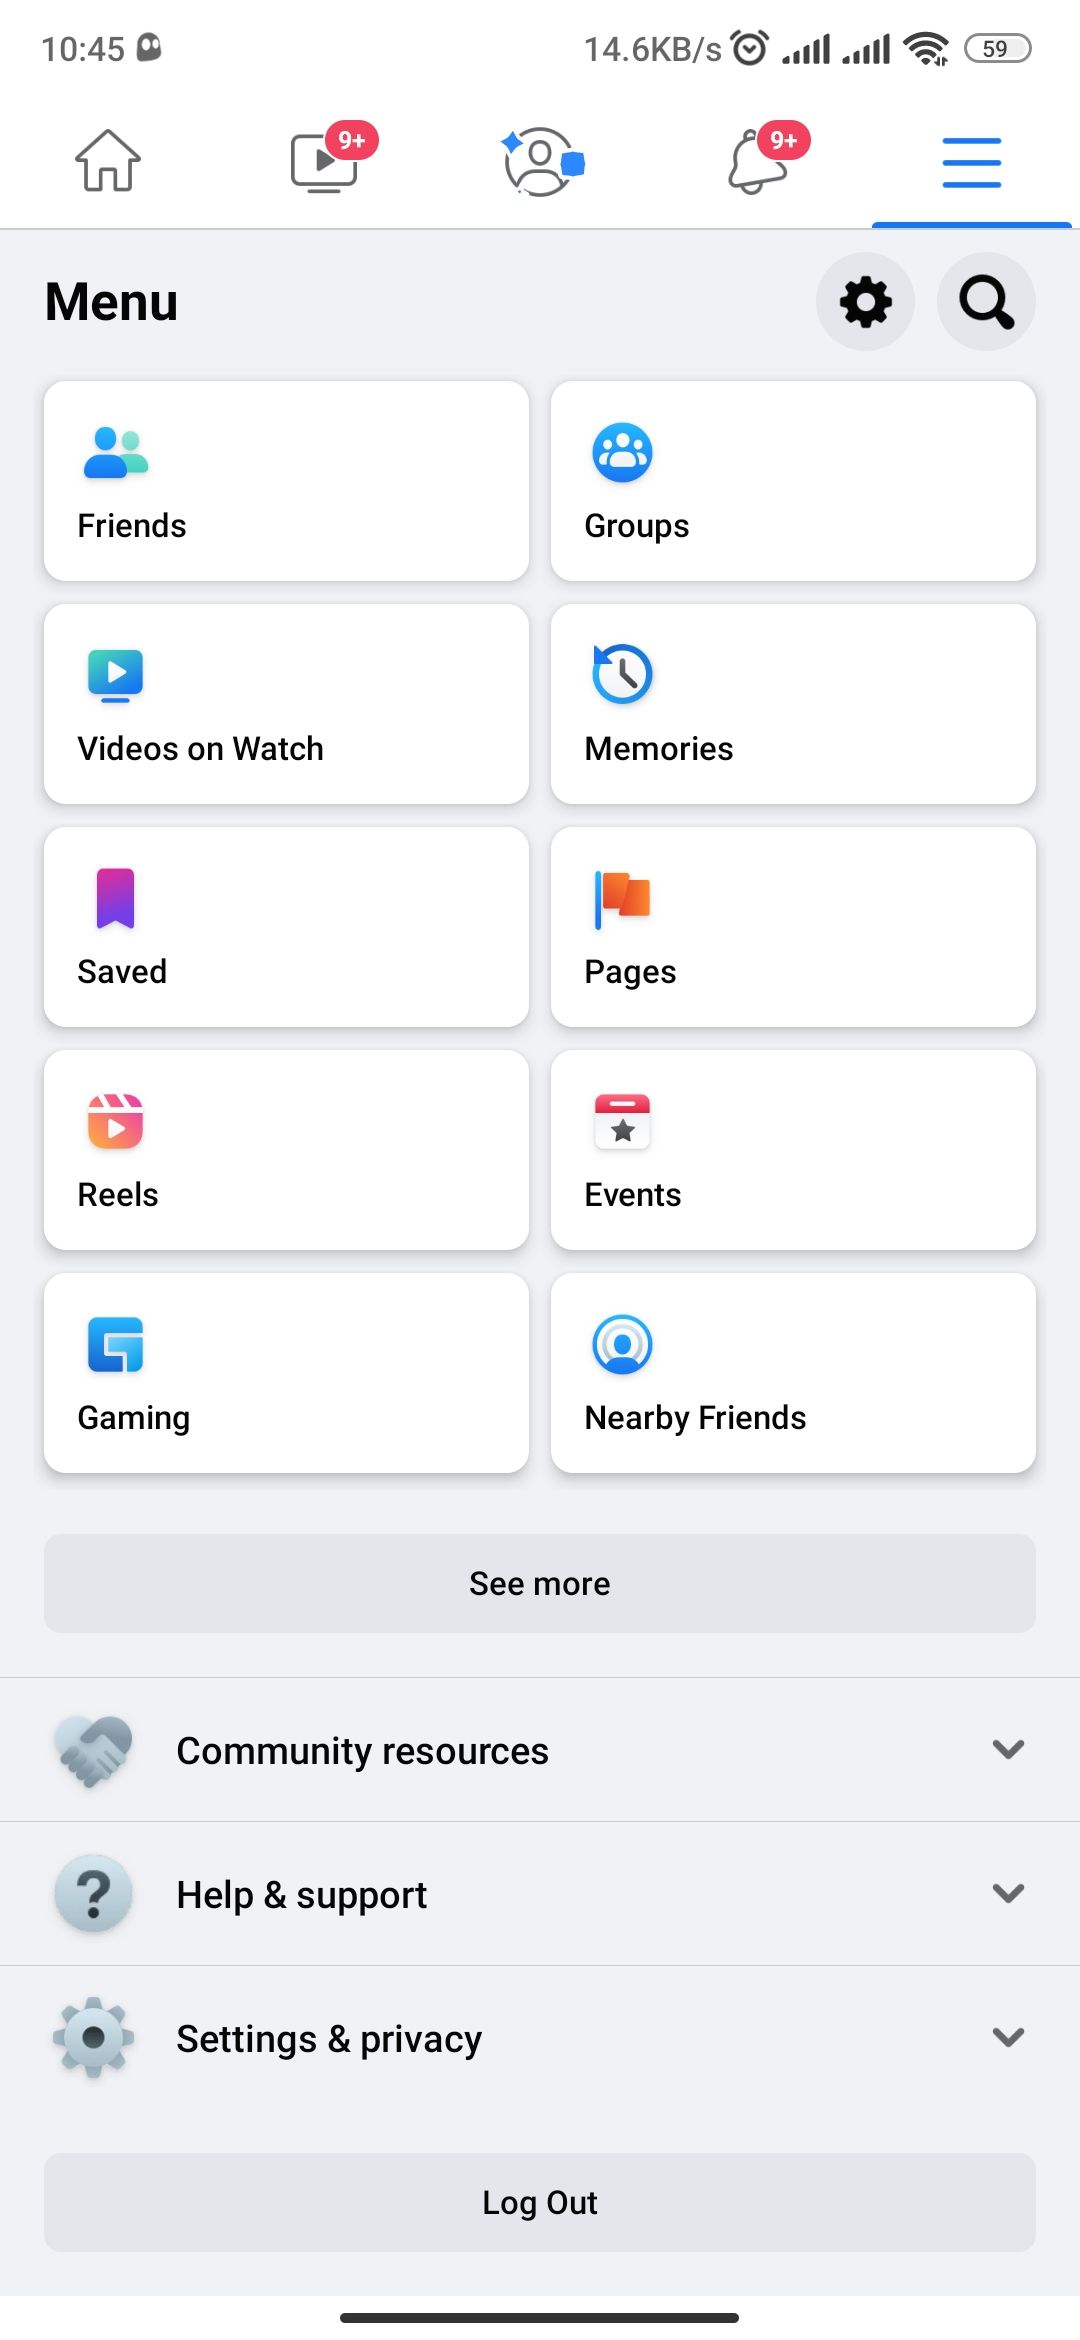
Once you have a copy of your Facebook data, the next step is to check which third-party apps are linked to your account. Since these apps use your Facebook credentials to log you in, it’s essential to add a different way to access your accounts. You can check which apps are linked to your Facebook account on Android with the following steps:
- Tap the hamburger menu (the three horizontal lines) in the top right.
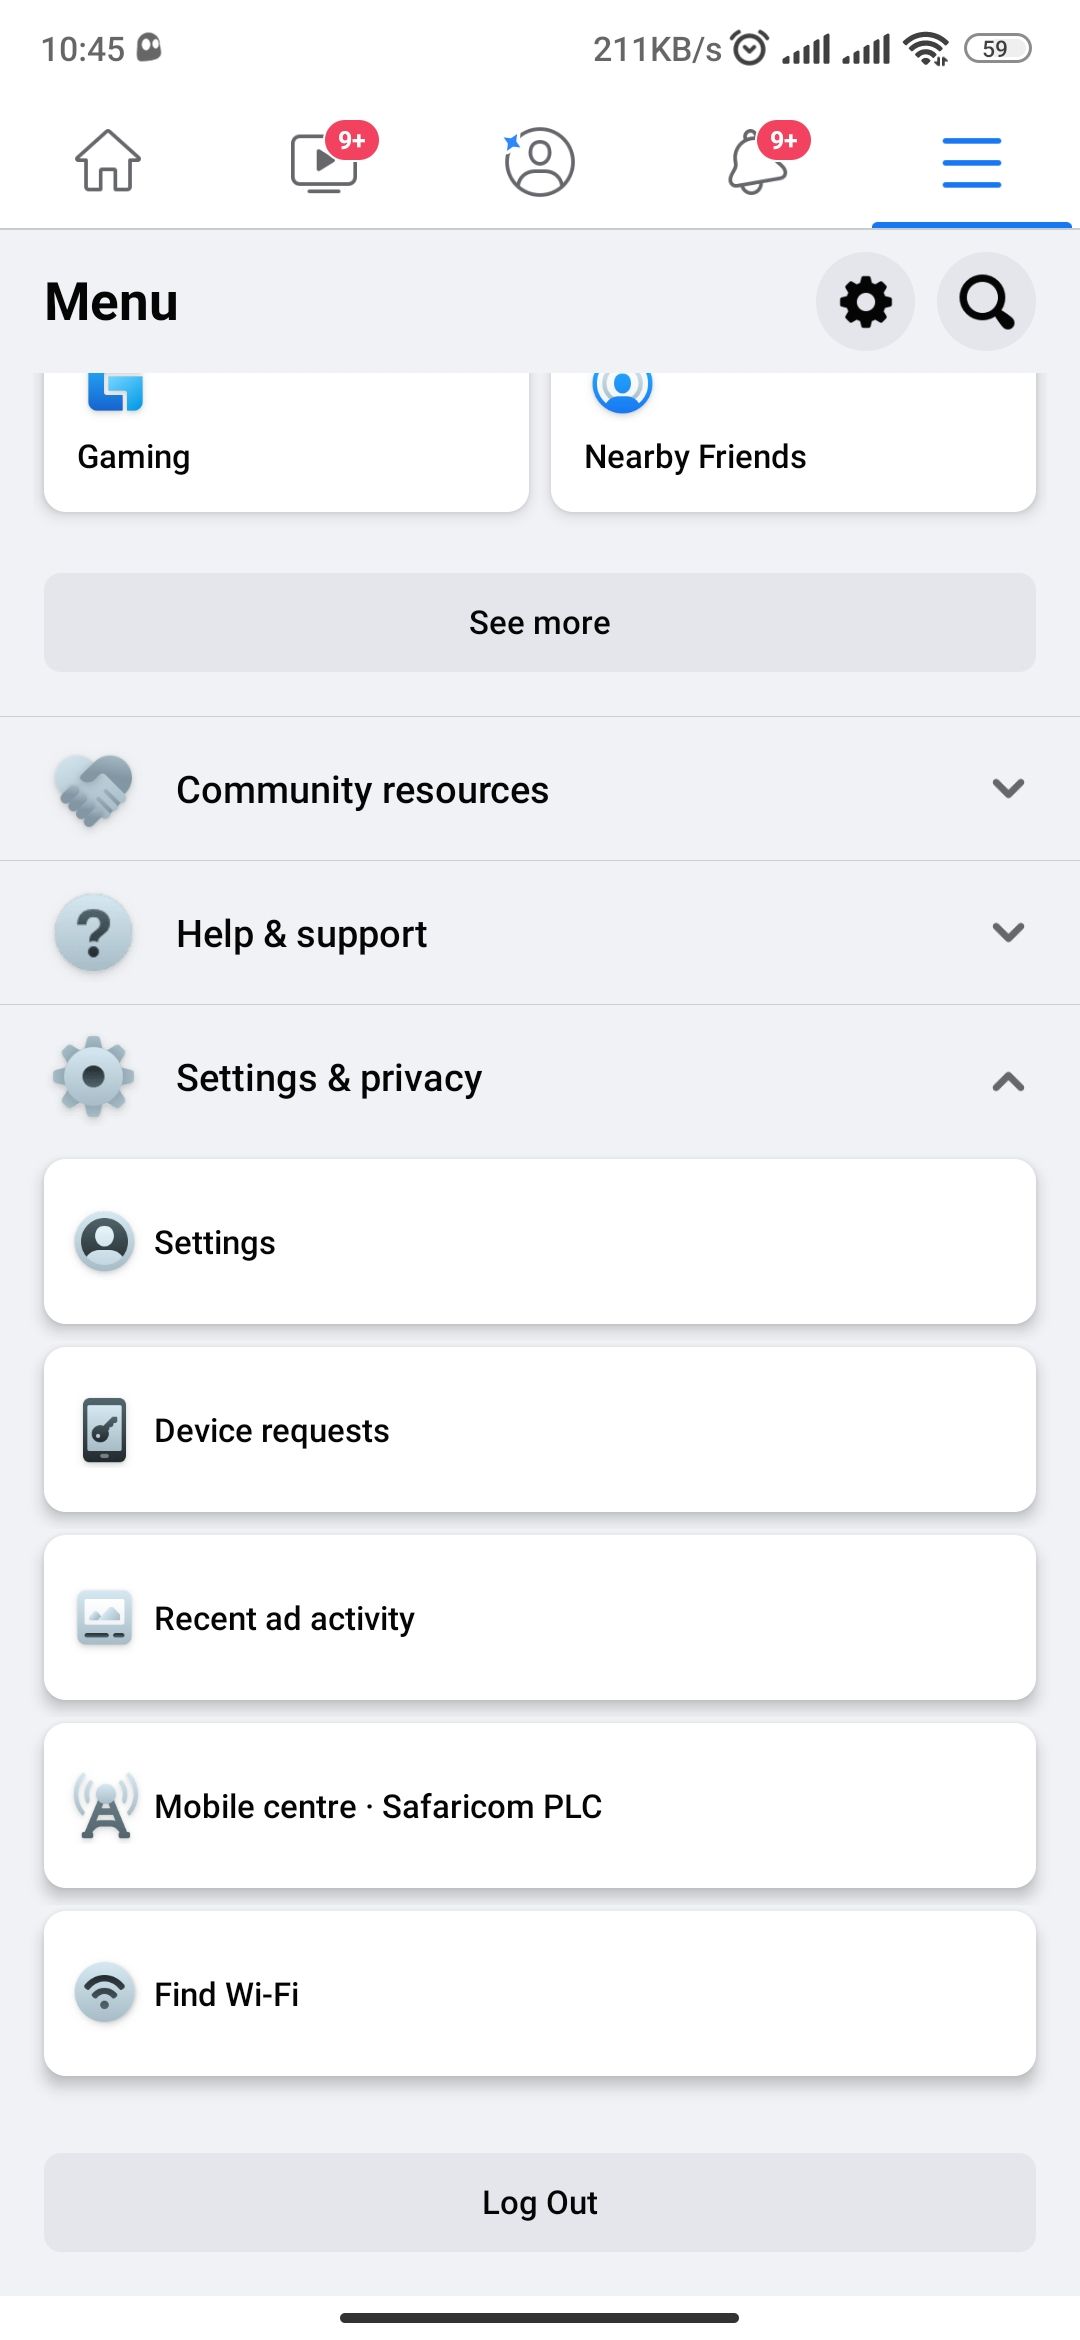
- Scroll down and selectSettings & privacy .
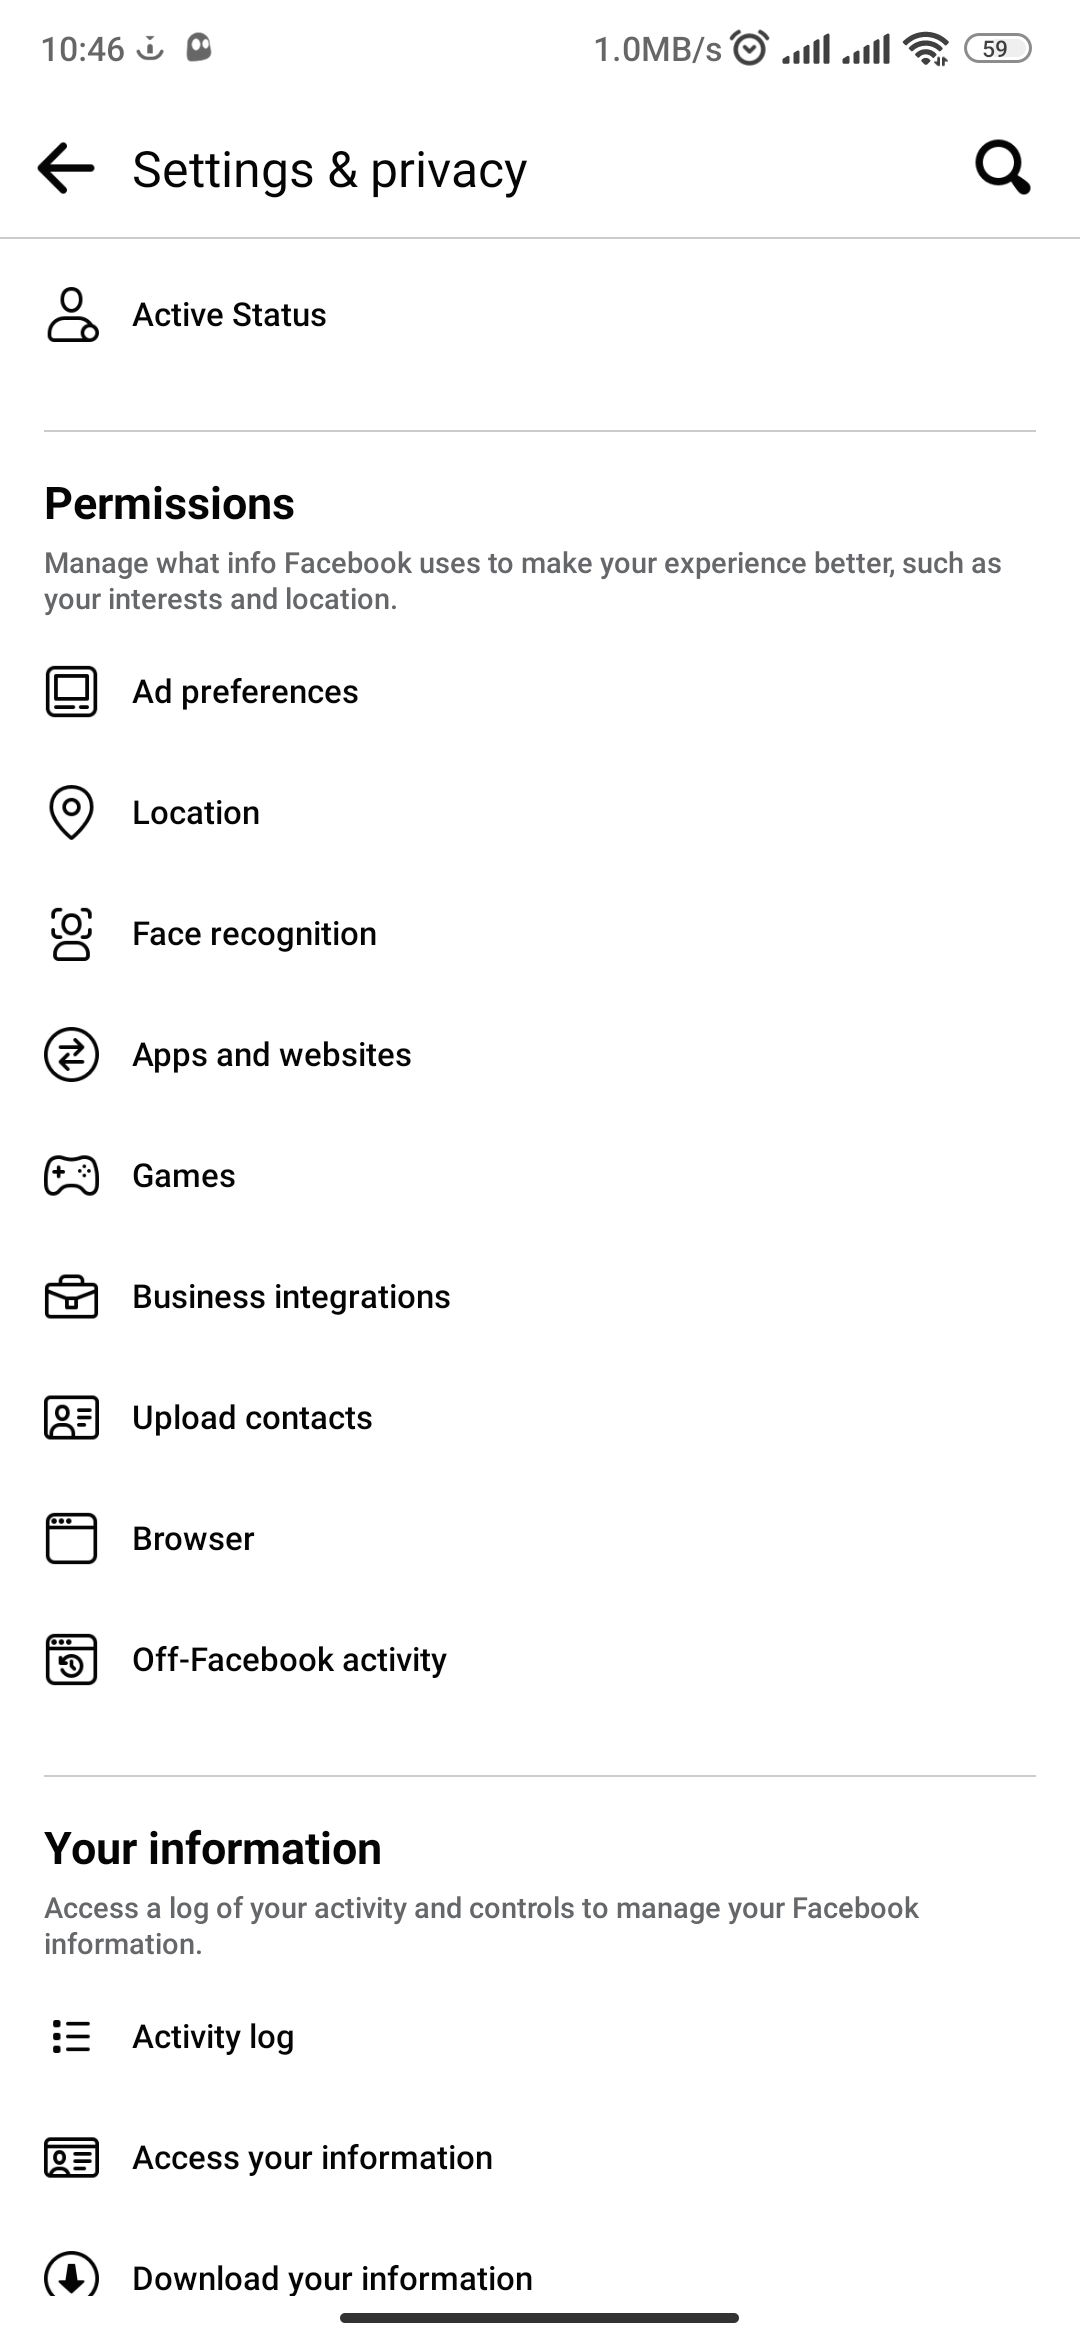
- Next, tapSettings and scroll down to thePermissions section.
- Here, tapApps and websites to see all the services connected to your account.
Close
Next, you should add an email and a password as a login option to each of these connected services to avoid losing access to your accounts.
How to Delete Your Facebook Account on Mobile
Once you’ve gone through the two key steps above, you can safely delete your Facebook account. Deleting a Facebook account on Android is straightforward. Here’s how:
- Tap the hamburger menu in the top right.
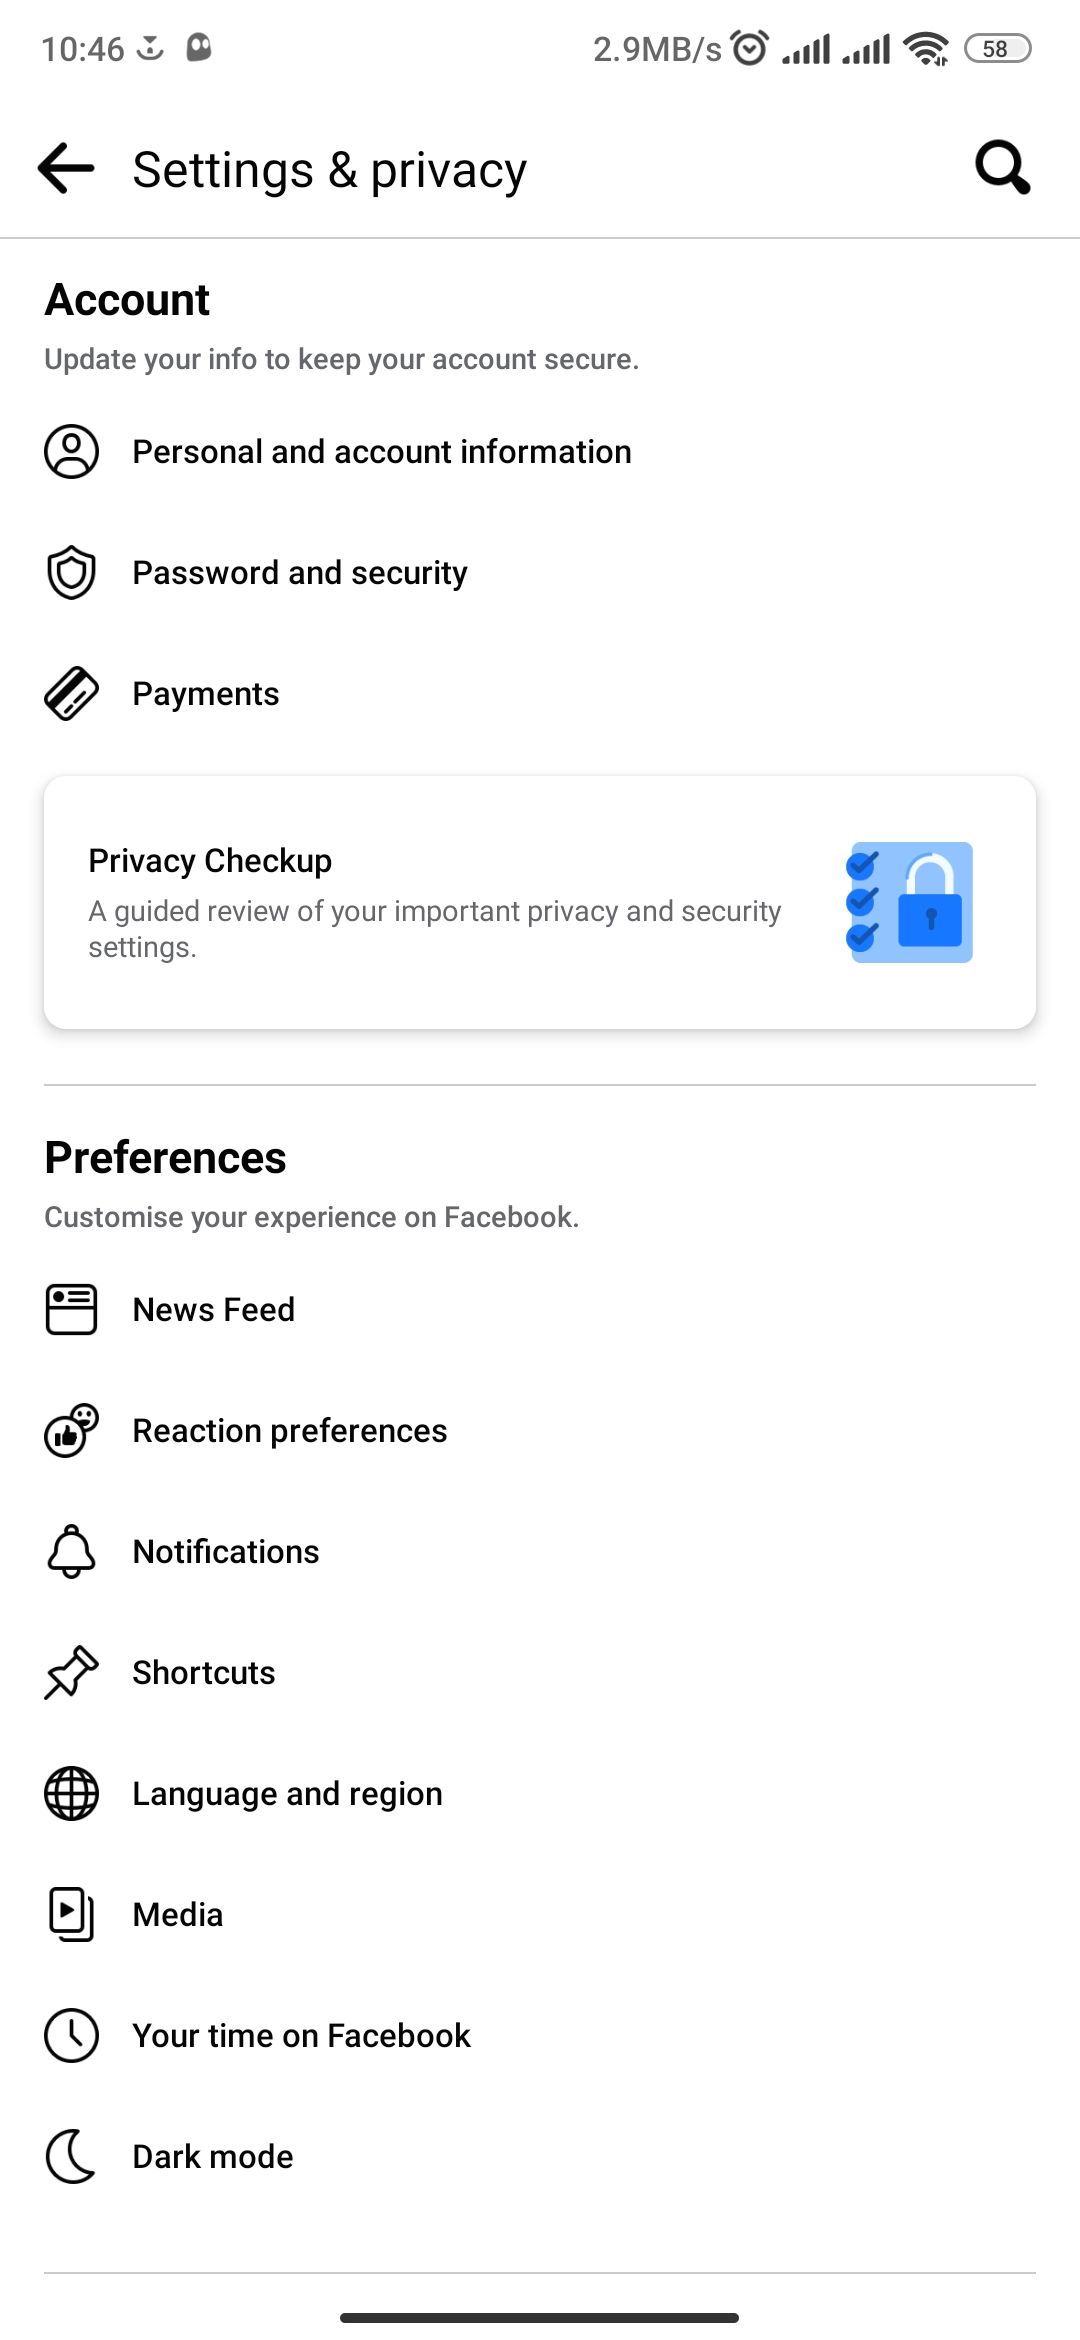
- Scroll down and go toSettings & privacy > Settings .
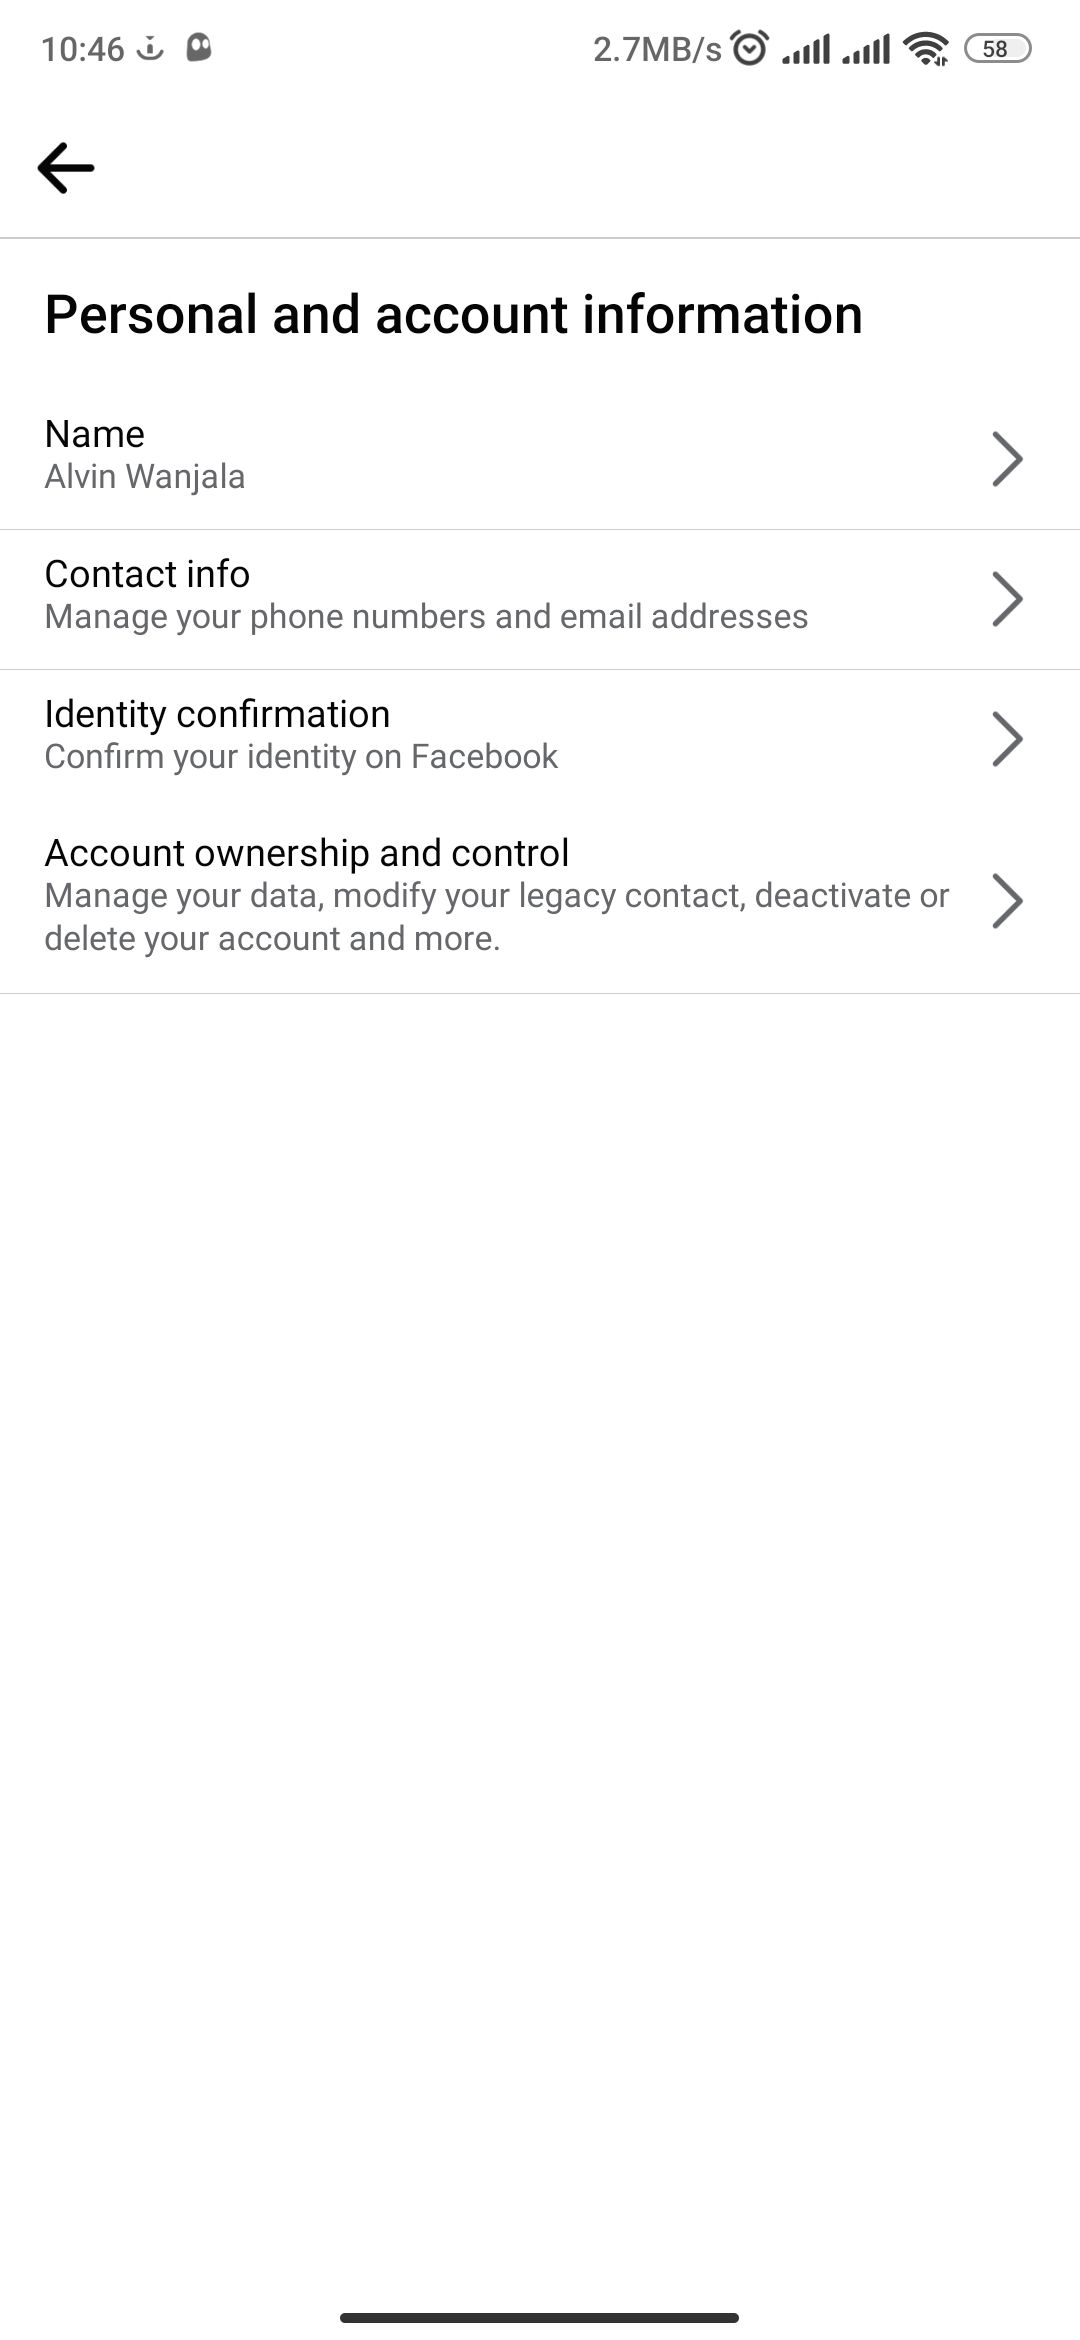
- Under theAccount section, selectPersonal and account information .
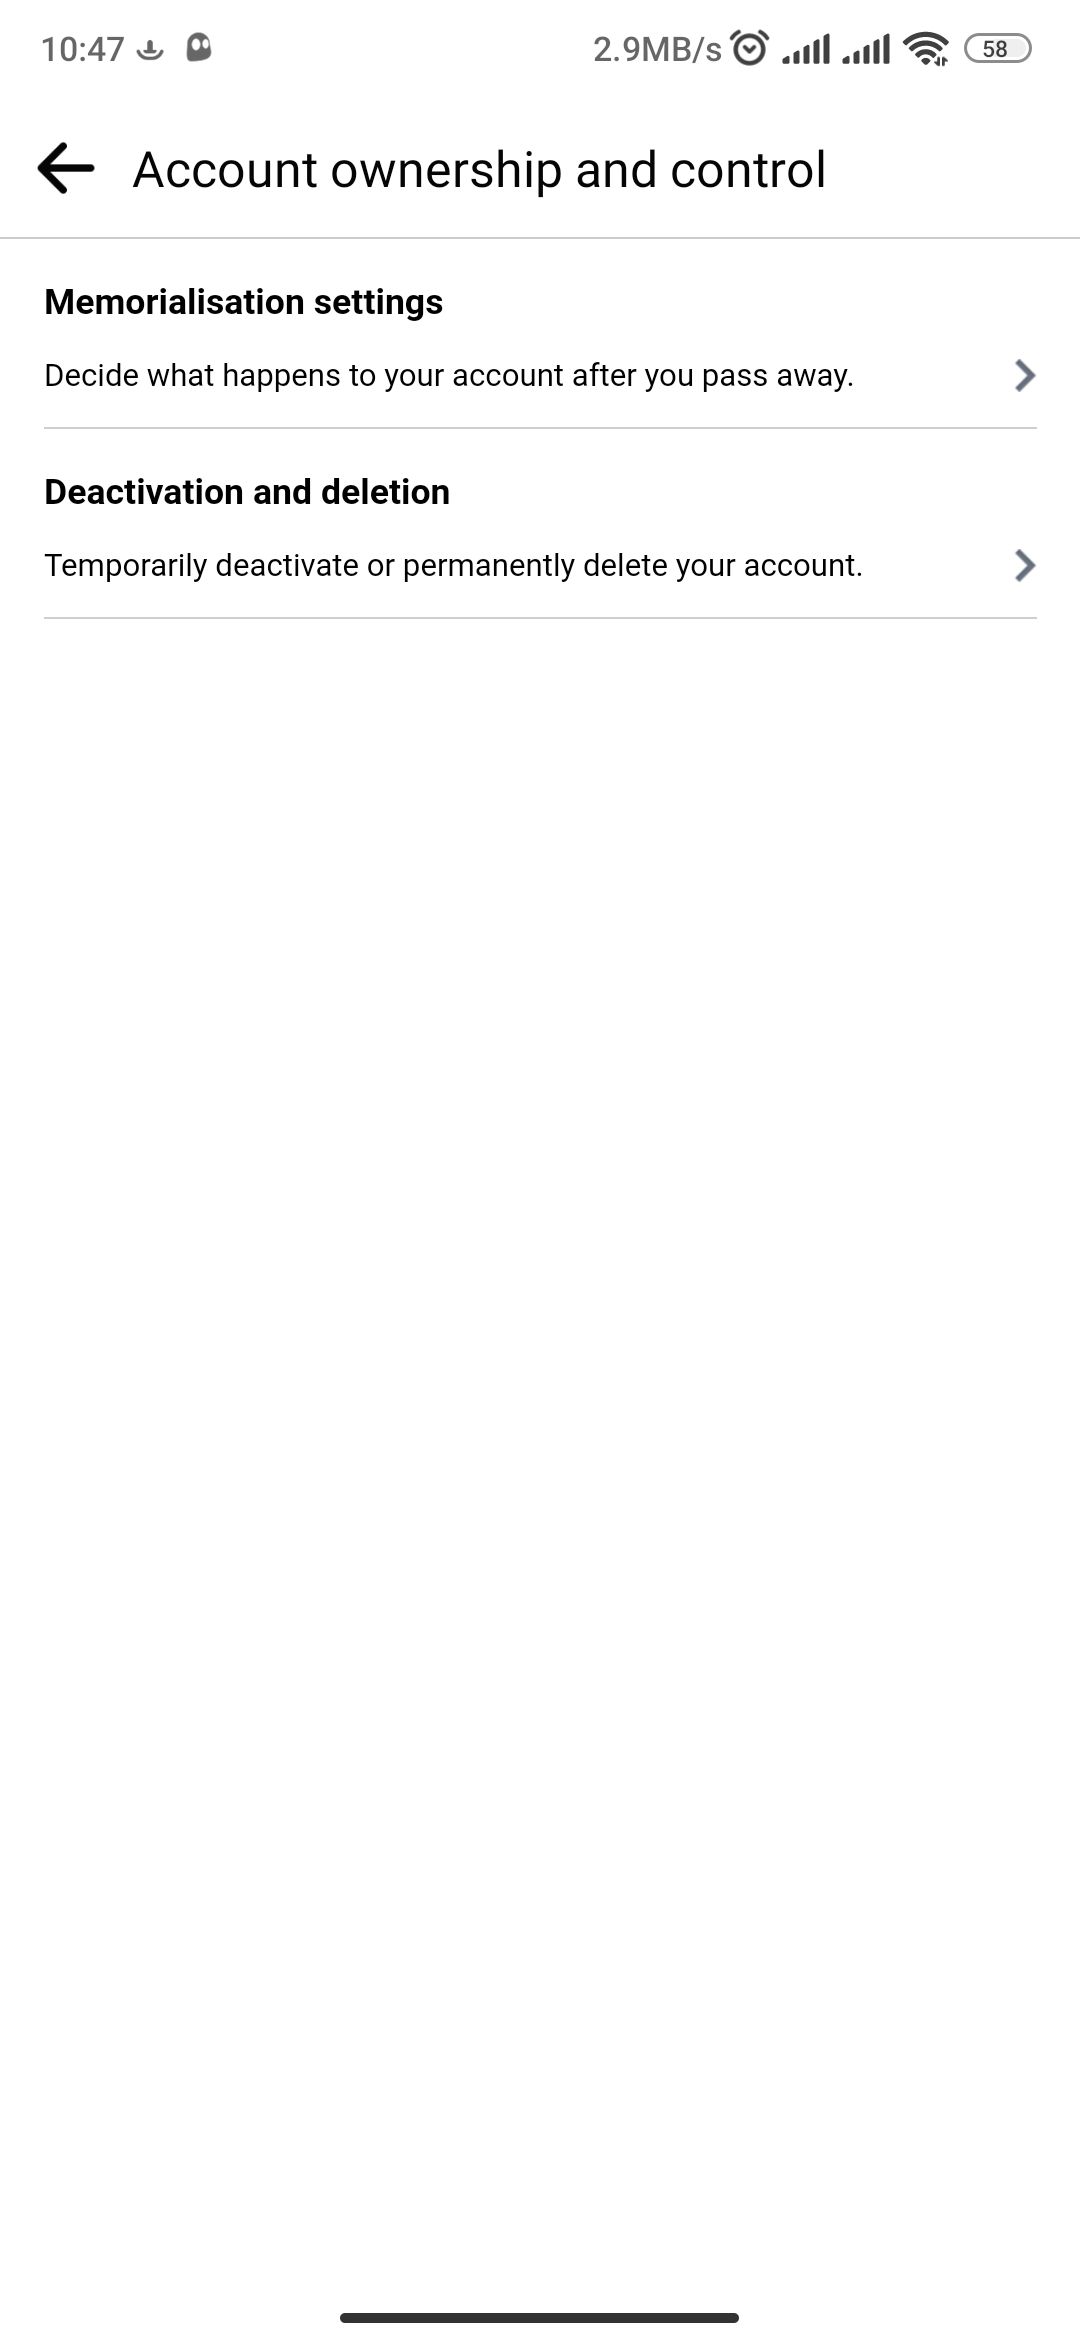
- Next, tap Account ownership and control > Deactivation and deletion .
Close
Next:
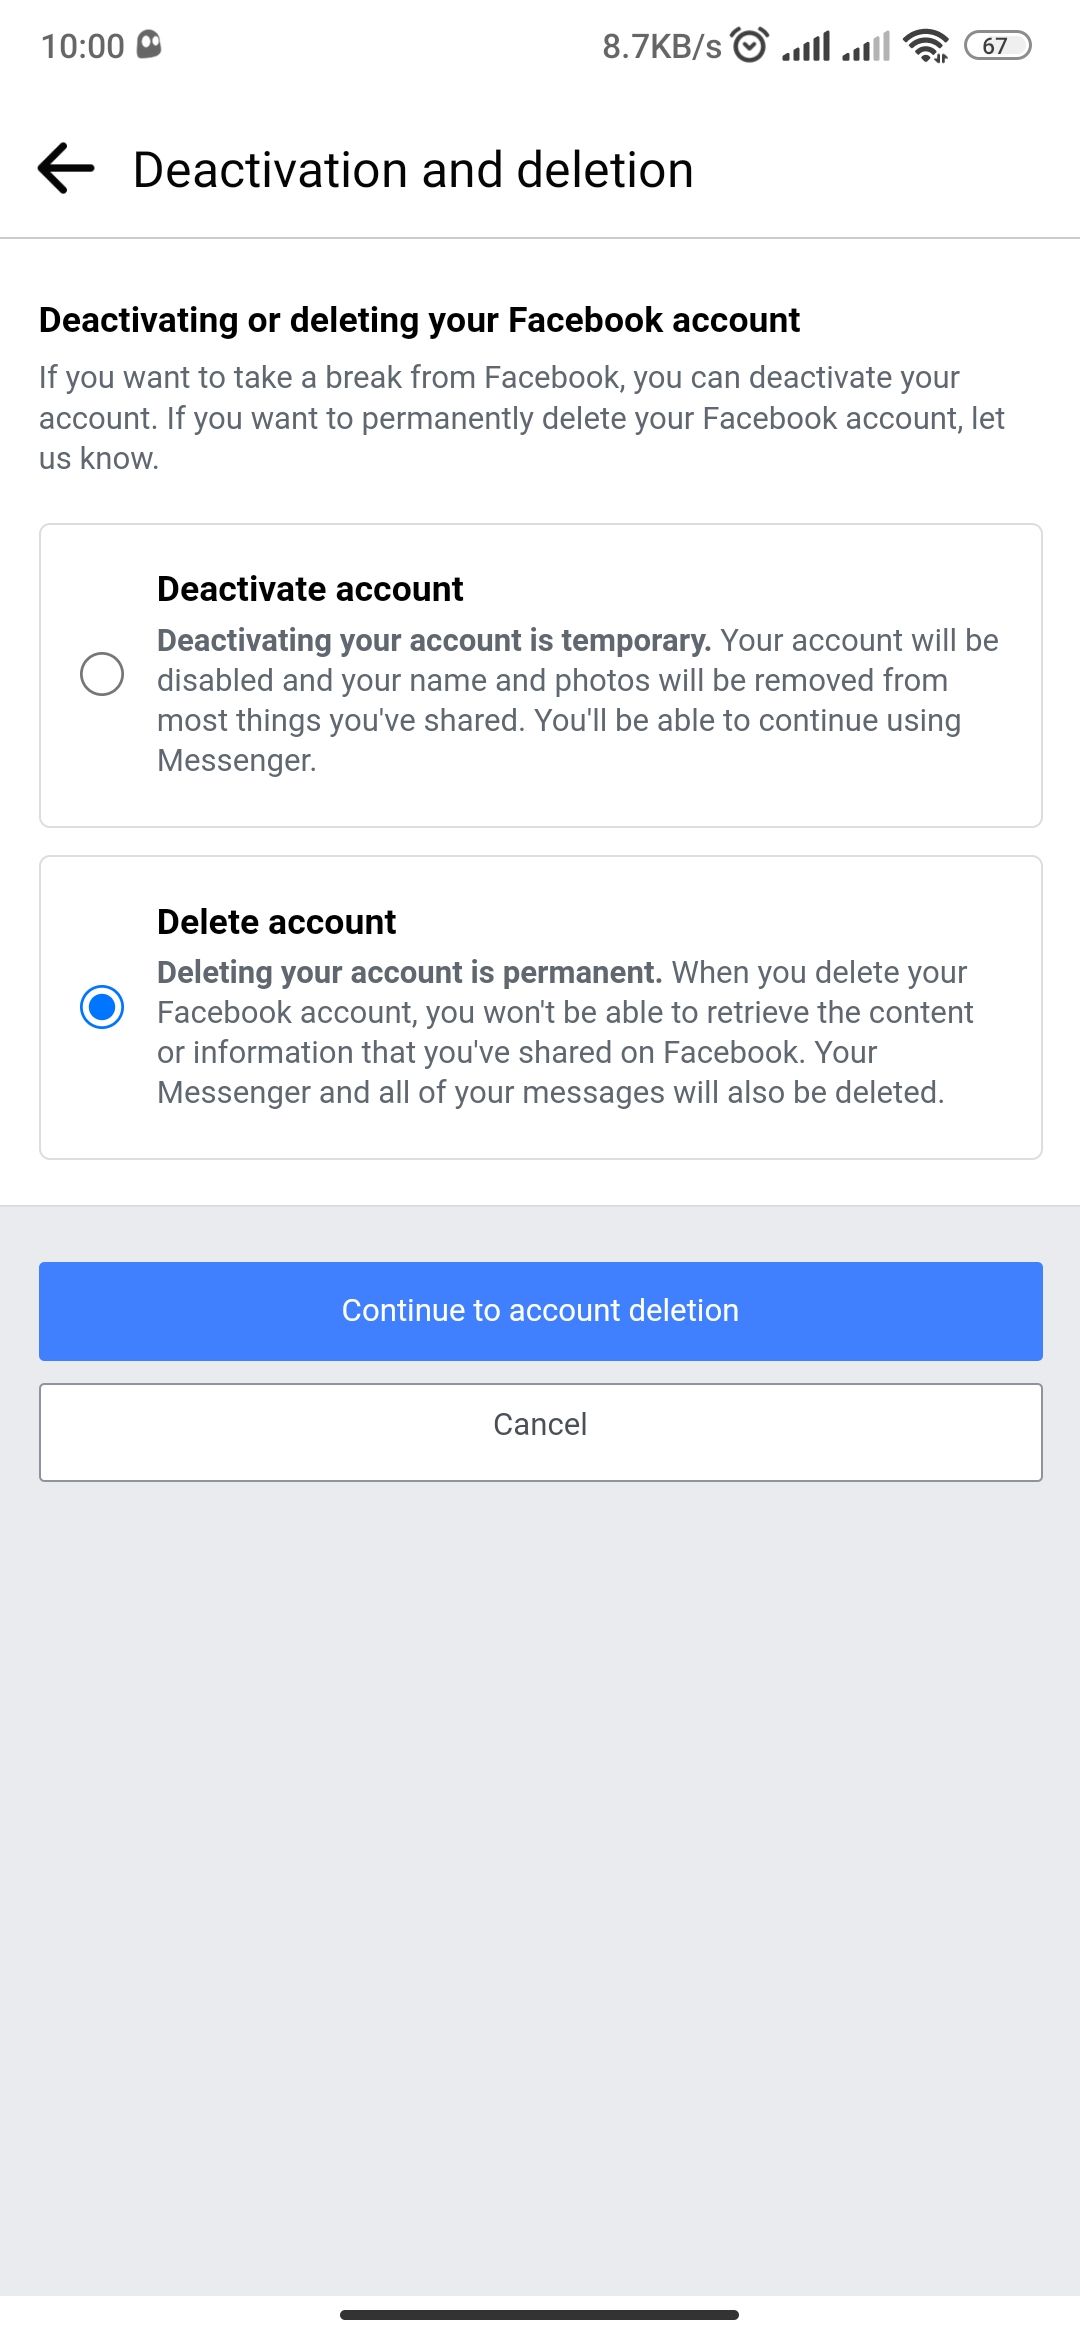
- SelectDelete account , then tap theContinue to account deletion button.
- Select a reason for your deletion first, or tapContinue to account deletion to skip.
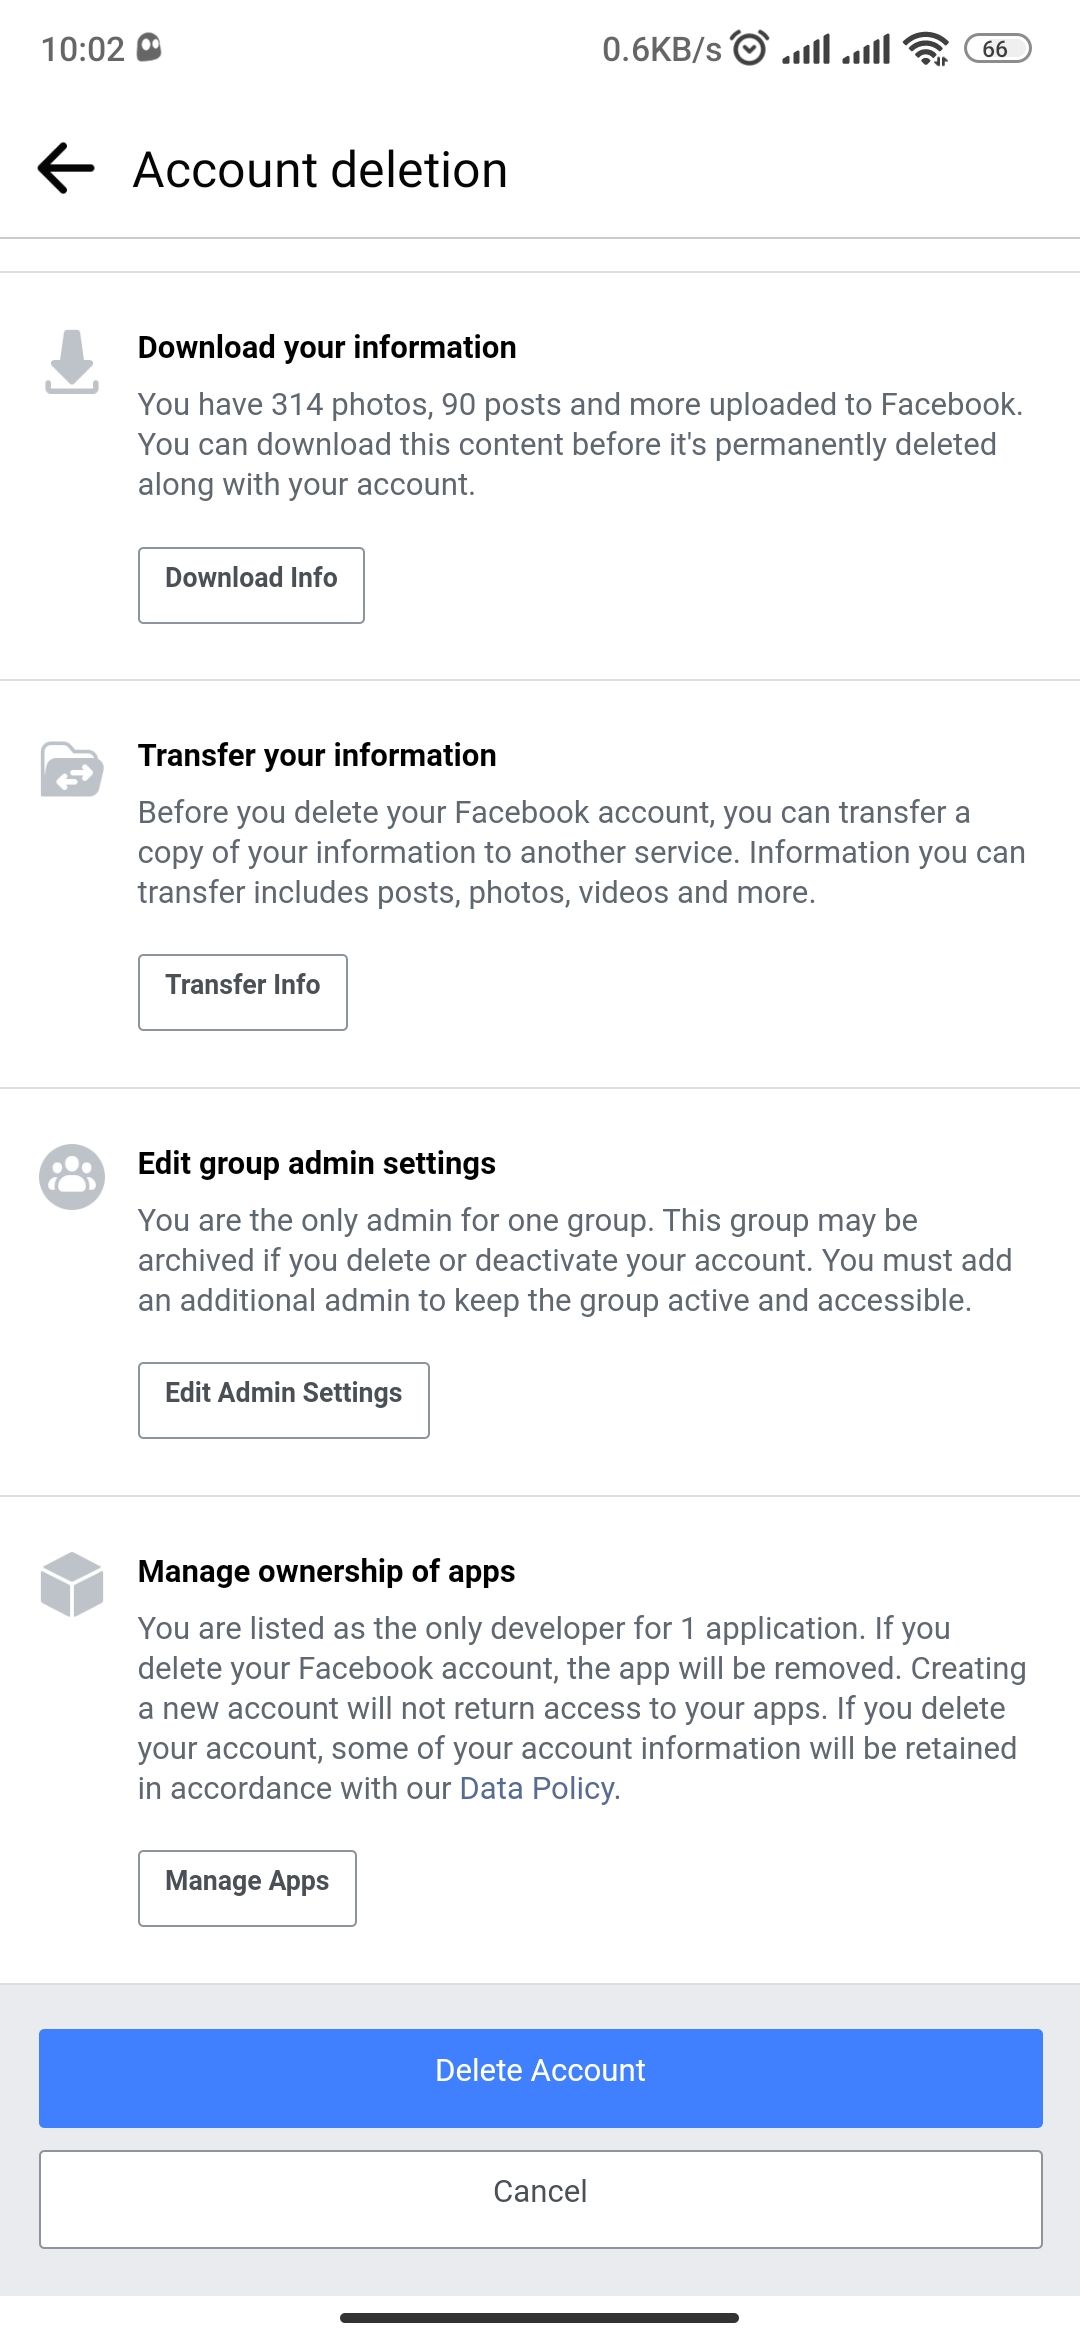
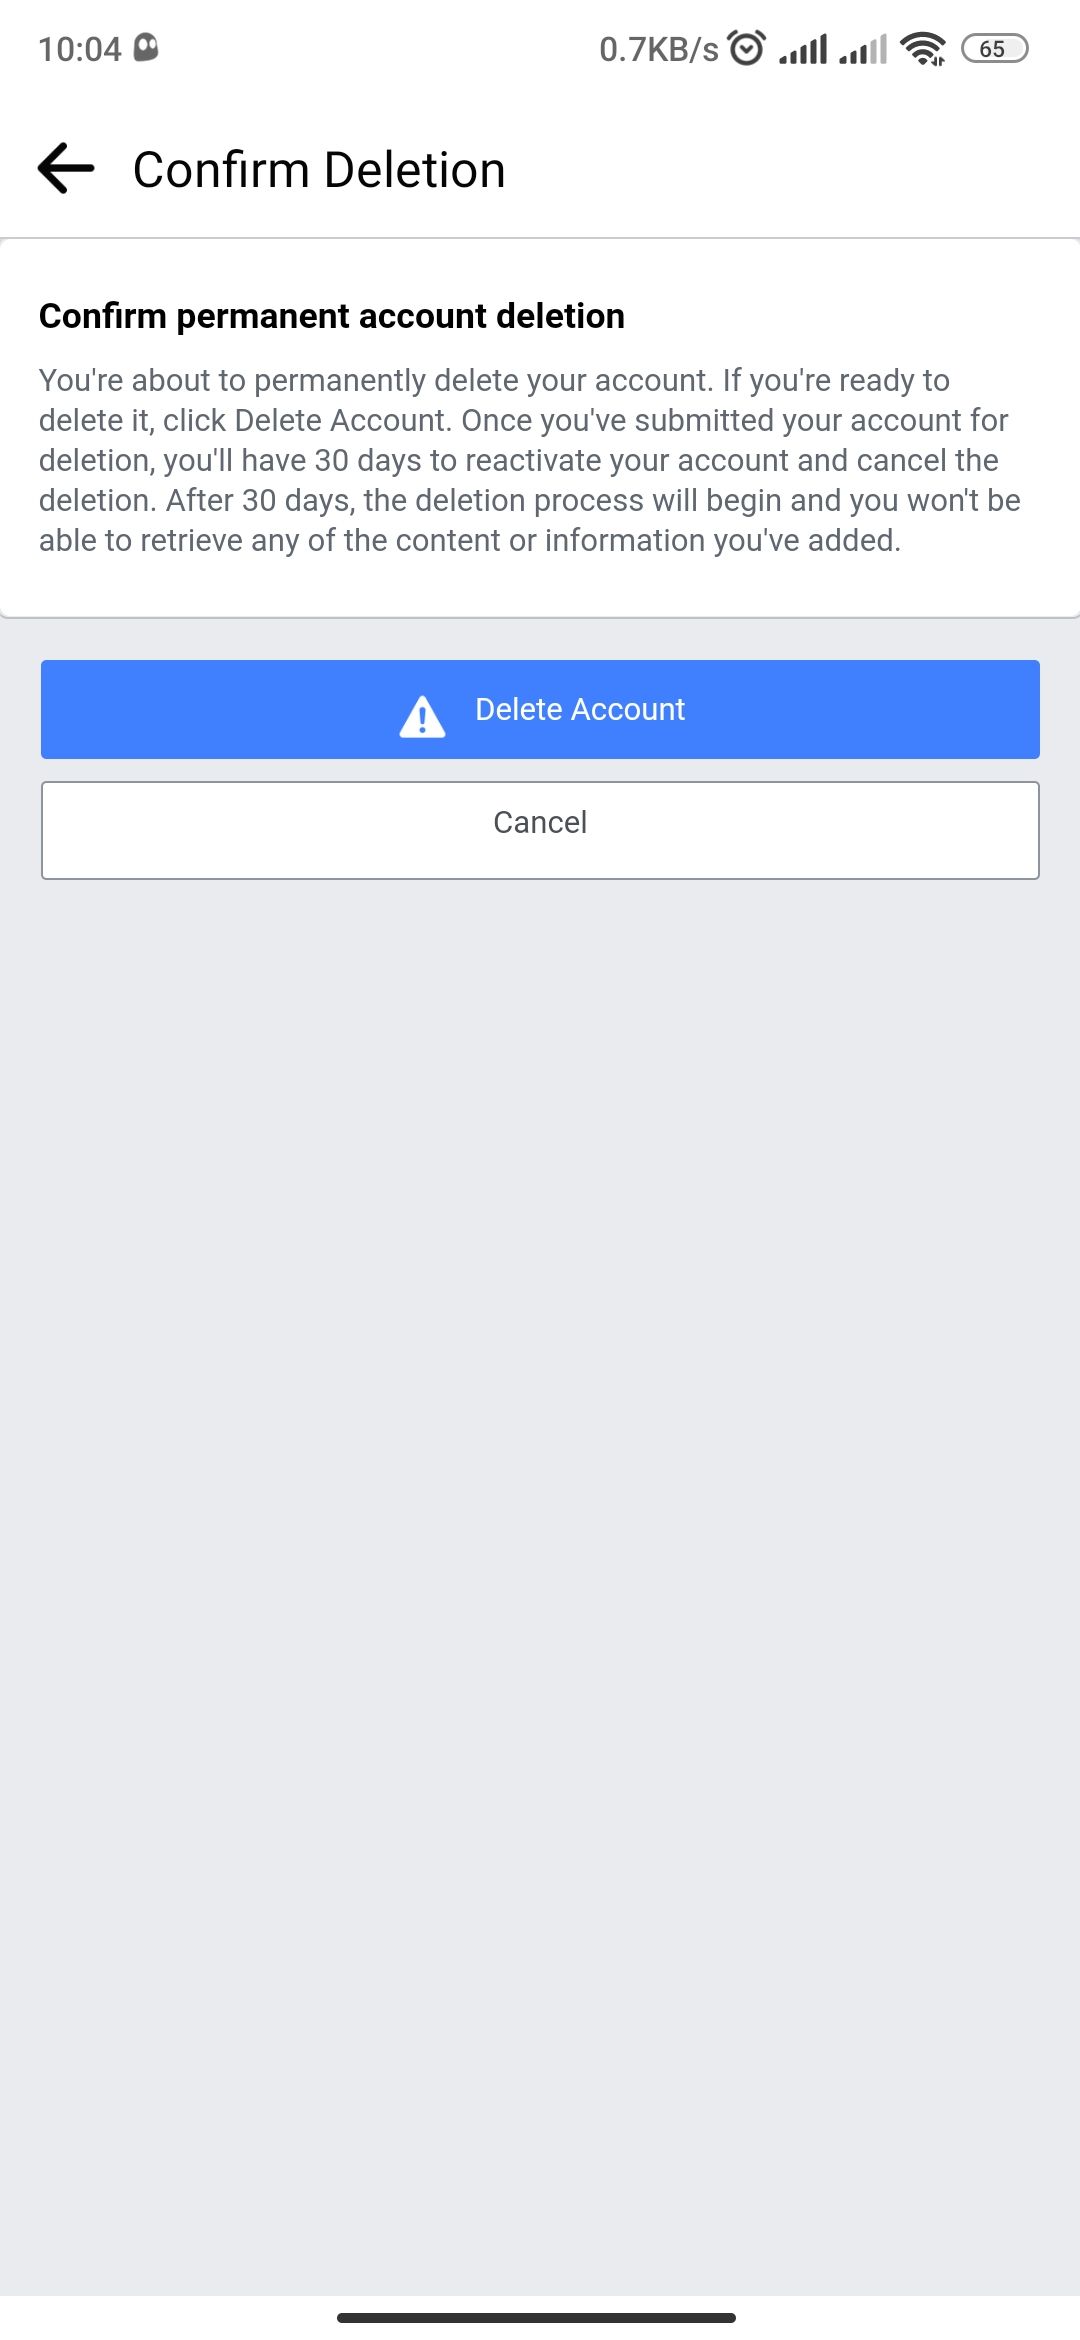
- The account deletion page will show you what you stand to lose if you delete your account. Read through to ensure you’re okay with that, then tapDelete Account .
- Enter your Facebook password and selectContinue > Delete Account to finish.
Close
Facebook will schedule your account for deletion and email you about the same. The platform gives you a grace period of 30 days within which you can log in, thus canceling the scheduled deletion.
Don’t log in for the next 30 days if you’re done with Facebook. Despite that, Facebook says it can take up to 90 days from the start of the deletion process to delete all the information you’ve shared permanently. However, don’t fret; your information will not be accessible to other users during the entire process.
Once you’ve deleted your Facebook account, the next step is to uninstall the app. Here’s a step-by-step guide onhow to remove unwanted Android apps .
How to Deactivate Your Facebook Account on Android
If the risk that comes with deleting your Facebook account isn’t worth it, here’s how to deactivate it instead:
- Tap the hamburger menu in the top right.
- Scroll down and go toSettings & privacy > Settings .
- Select Personal and account information > Account ownership and control .
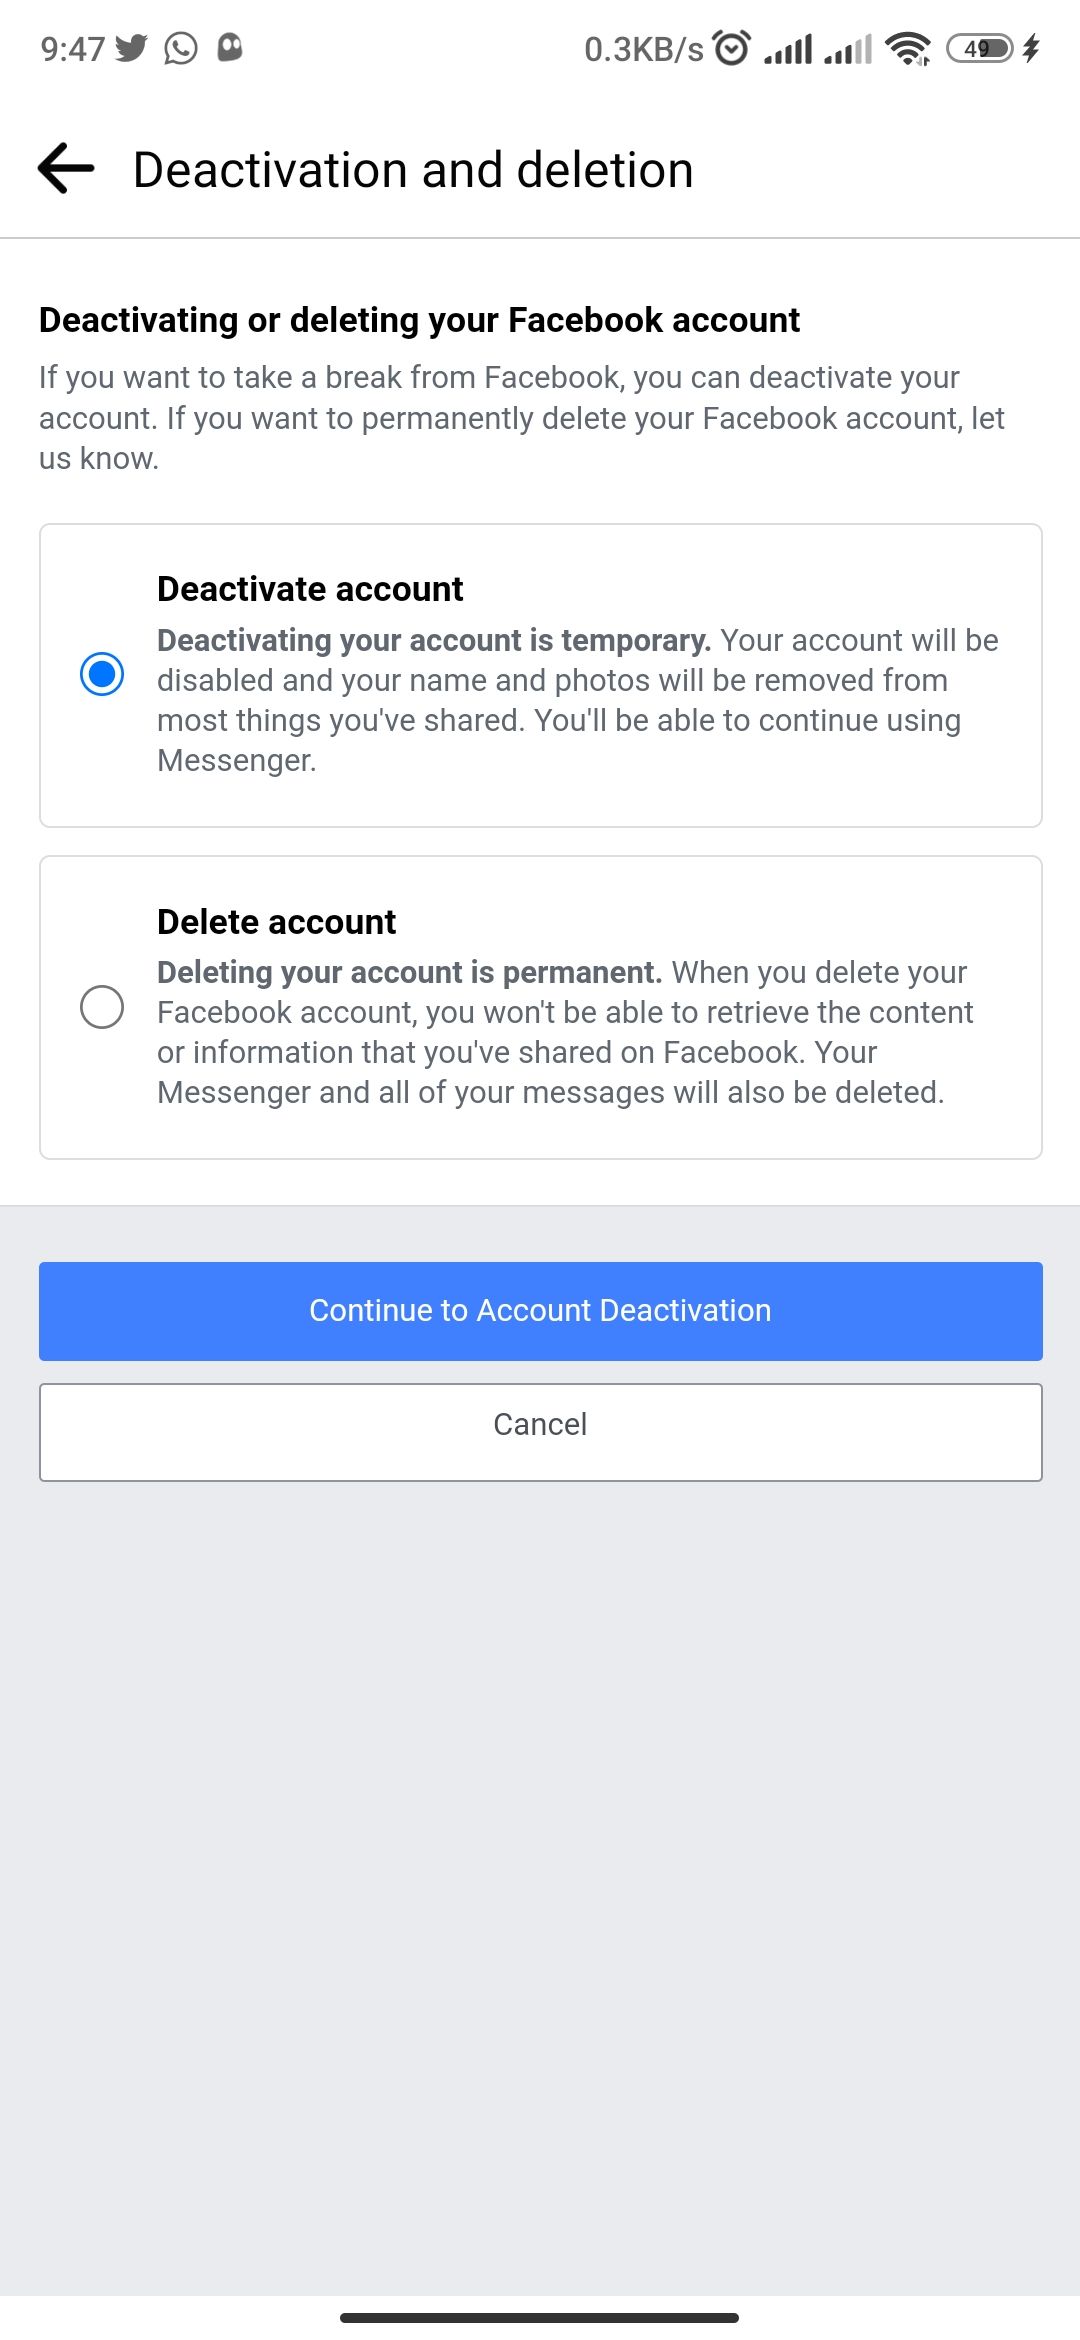
- TapDeactivation and deletion , then select Deactivate account > Continue to Account Deactivation .
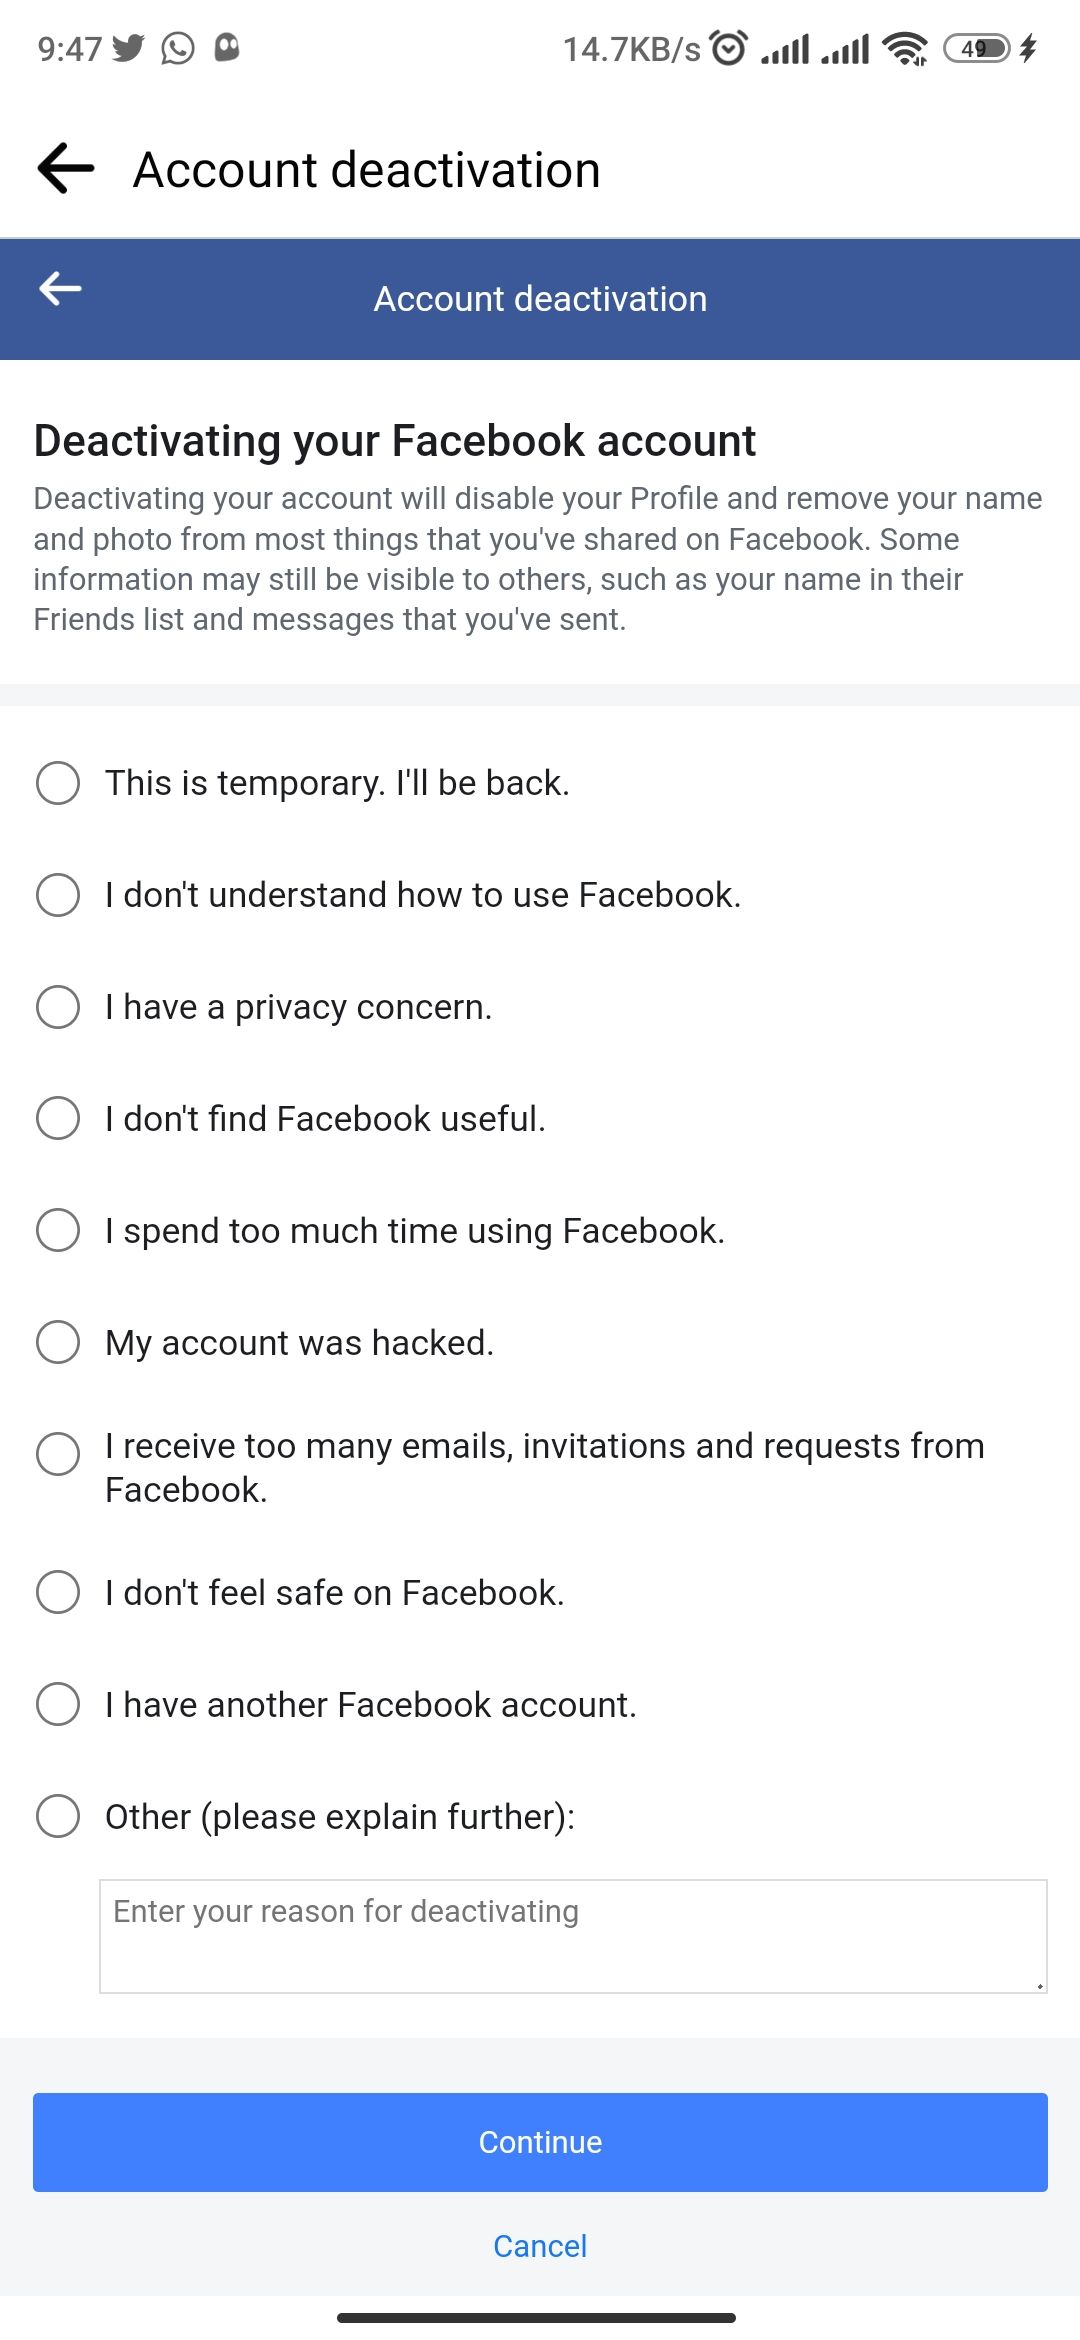
- Enter your Facebook password, then tapContinue . Next, select a reason for deactivating and tapContinue . Facebook will show you different information on the next page, depending on your reason.
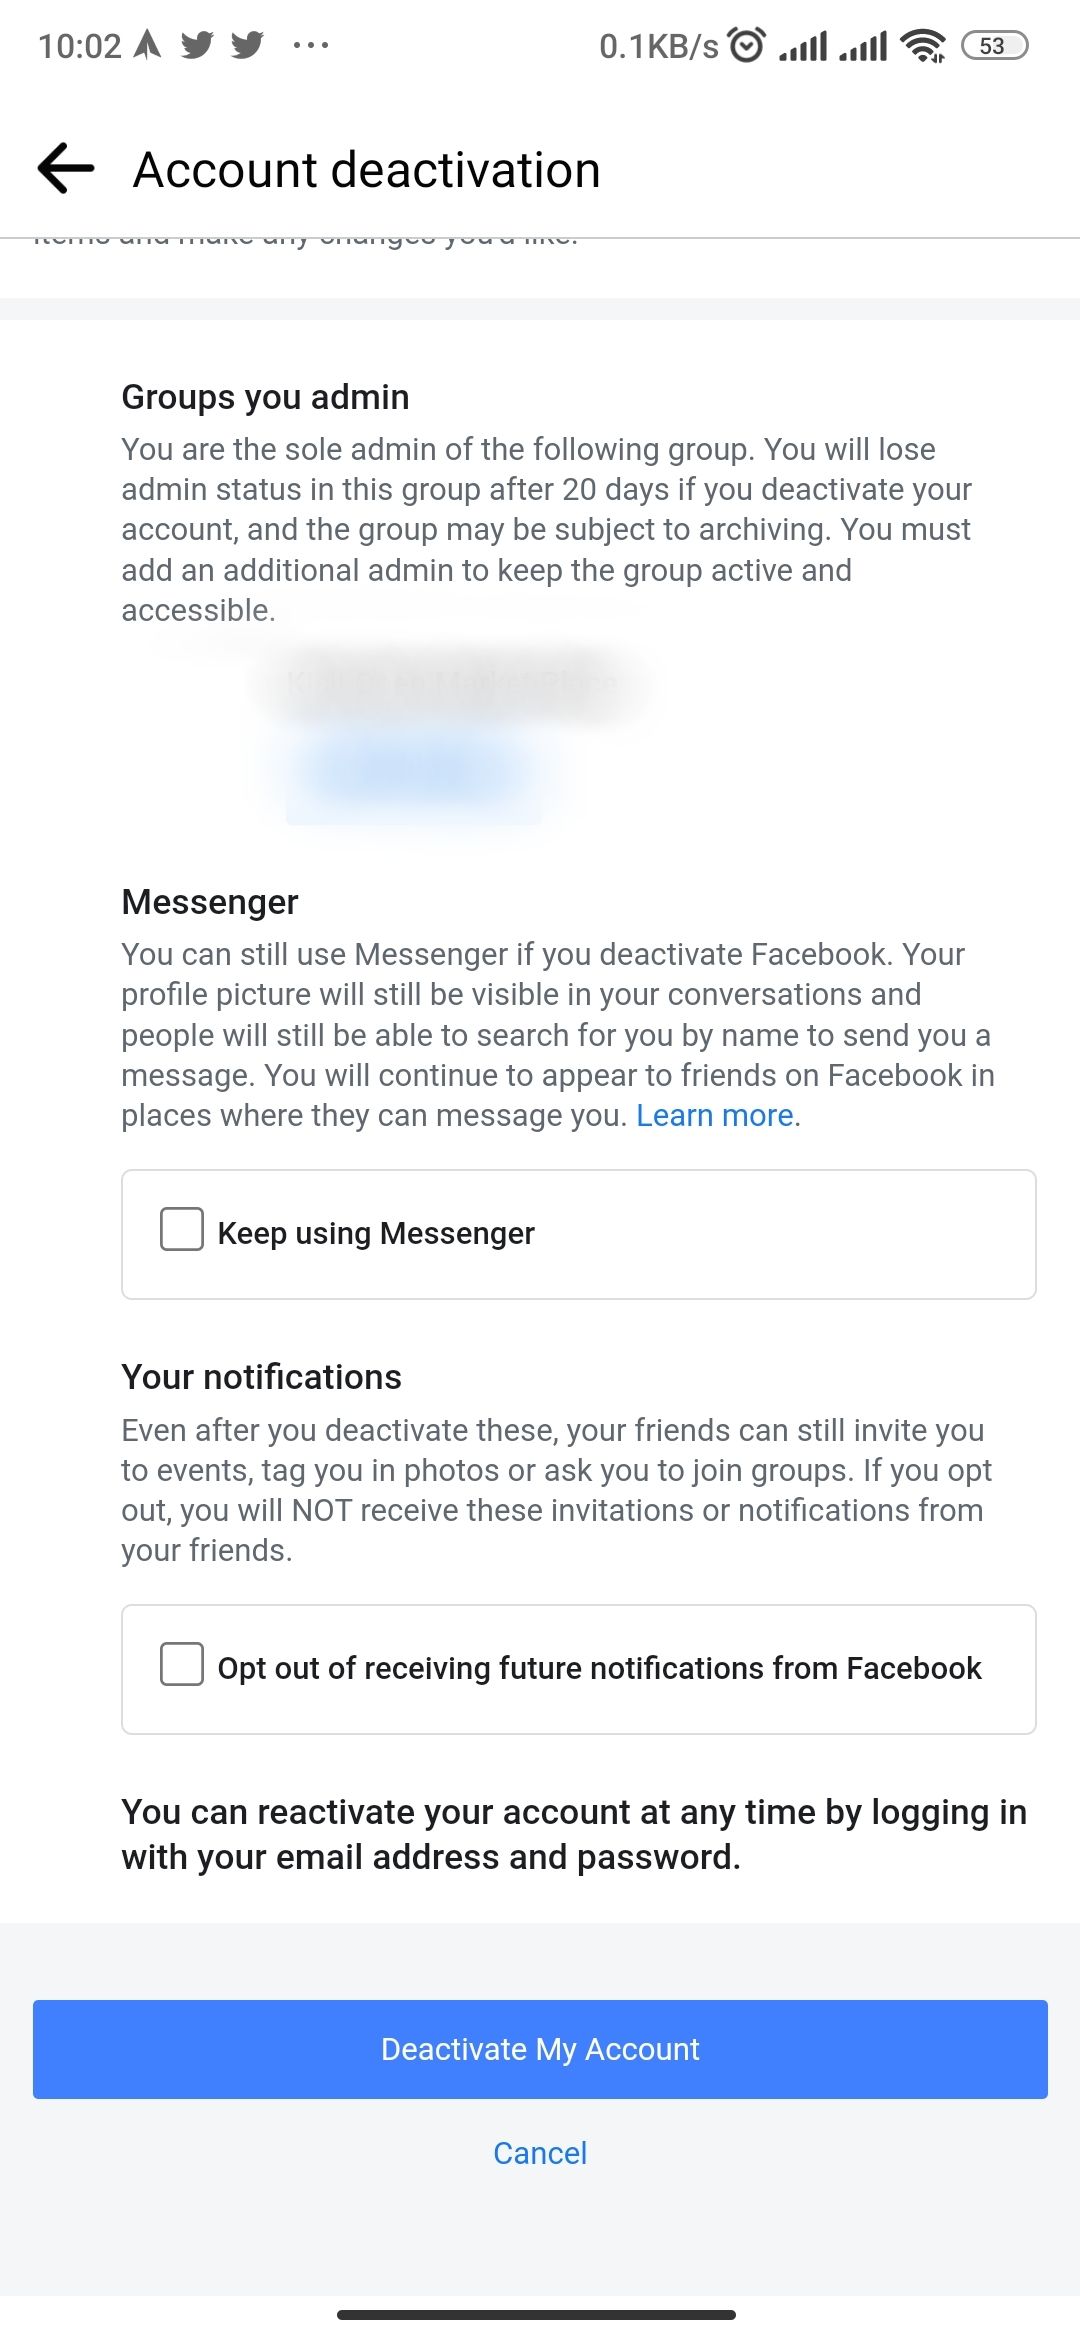
- SelectContinue > Deactivate My Account to finish.
Close
You will instantly be logged out. You can reactivate your account by simply signing in once more.
Ditch Facebook Forever
Facebook is one of the most popular social media platforms. However, you can ditch the platform forever by deleting your account instead of being embroiled in the company’s endless privacy and security issues. Deleting your Facebook account on Android is straightforward if you follow the above-mentioned steps.
But before doing so, you should download your history and add different login methods for apps and websites that use your Facebook credentials. You can also deactivate your account temporarily if you wish to return later.
Also read:
- [New] 2024 Approved Expertise in App Performance Review
- [New] In 2024, Capturing Screen Content via Built-In Recorders in the Mate and P Series.
- [New] In 2024, Enlightened Exercits - Discovering the Most Inspiring Yogis Online
- [New] In 2024, Skyrocketing Sales How Ad Revenue Transforms YouTube Videos
- 2024 Approved Latest VR Gaming Engines Review - 2023 Edition
- Determining if [email protected] Is a Secure and Legitimate Mail Service From FB
- Digital Detox: Quitting as Friends on Social Media
- Digital Disconnection: Prospects of Life
- Digital Disruption: All Key Social Networks Downed
- Digital Frontier Contributes to Health Crisis Alleviation
- Digitally Dividable: Social Sites' Revenue Rules
- Disconnecting: Ending Your Facebook Friendship
- Dive Into Facebook’s Updated Policy Framework with Hub Debut
- In 2024, Getting the Pokemon Go GPS Signal Not Found 11 Error in Vivo V30 Lite 5G | Dr.fone
- In 2024, Unleash Creativity in Memes Gen'rator Assistance
- In 2024, Unlock Your Itel P55+s Potential The Top 20 Lock Screen Apps You Need to Try
- New iPhone 13 Pro Restore from iCloud Stuck on Time Remaining Estimating | Stellar
- Title: How to Purge Your Facebook Data on Android
- Author: Michael
- Created at : 2024-12-20 20:01:34
- Updated at : 2024-12-27 16:29:15
- Link: https://facebook.techidaily.com/how-to-purge-your-facebook-data-on-android/
- License: This work is licensed under CC BY-NC-SA 4.0.