The Ultimate Guide to Removing a Facebook Community

The Ultimate Guide to Removing a Facebook Community
A Facebook group is a great way to share information with your friends and followers. However, there may come a time when you want to delete your group.
If you are ready to say goodbye to it, this article will help you.
Here’s what you need to know about how to delete a Facebook group on your mobile and desktop.
Disclaimer: This post includes affiliate links
If you click on a link and make a purchase, I may receive a commission at no extra cost to you.
What You Need to Know Before Deleting Your Facebook Group
A group can have multiple admins, however, only the original creator can delete it. The only way you can delete a group you didn’t create is when the original creator chooses to leave it.
Also, deleting a group is a permanent action, meaning you can’t get your group back once it’s deleted. If you’re overwhelmed with managing posts and new members, but would still like to keep the group, you may want to “pause” the group instead.
Related:How to Enable Anonymous Posting in a Facebook Group
Facebook provides a pause option for admins who are overwhelmed withmanaging posts and member requests in their group. When you pause a group, new posts, comments, and reactions will be paused for all members, including admins.
To notify members, Facebook displays a message at the top of the group, letting them know that activity on the group has been paused. This is so they’re not left in the dark as to why they can’t create new posts or make comments.
That being said, if you’d rather pause your group, here’s how:
How to Pause Your Facebook Group
You can pause your Facebook group via any channel you use to access it. We’ll cover how to pause your group on mobile and the web.
How to Pause Your Facebook Group on Mobile
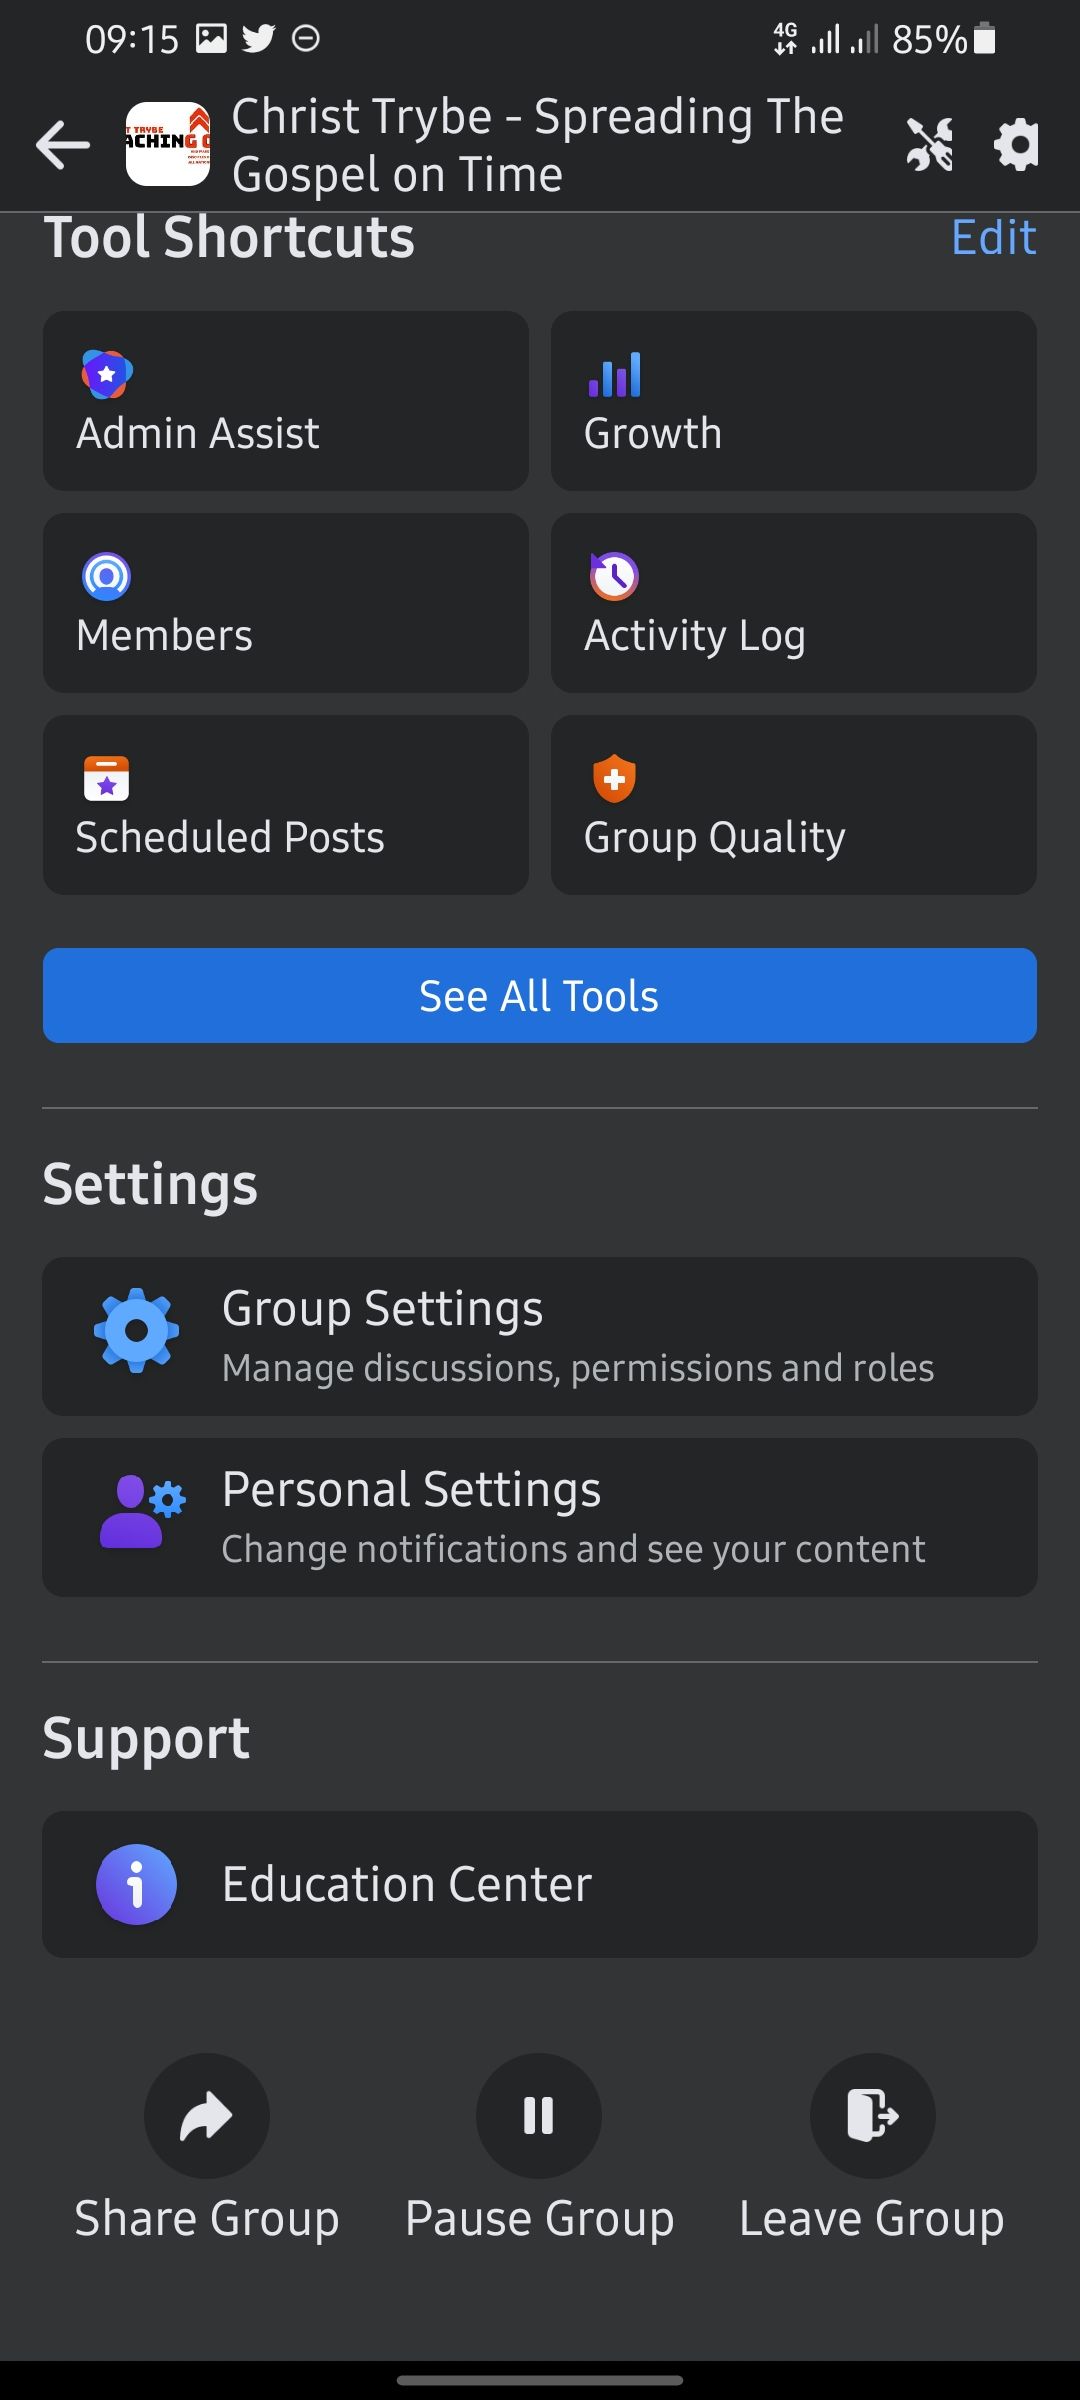
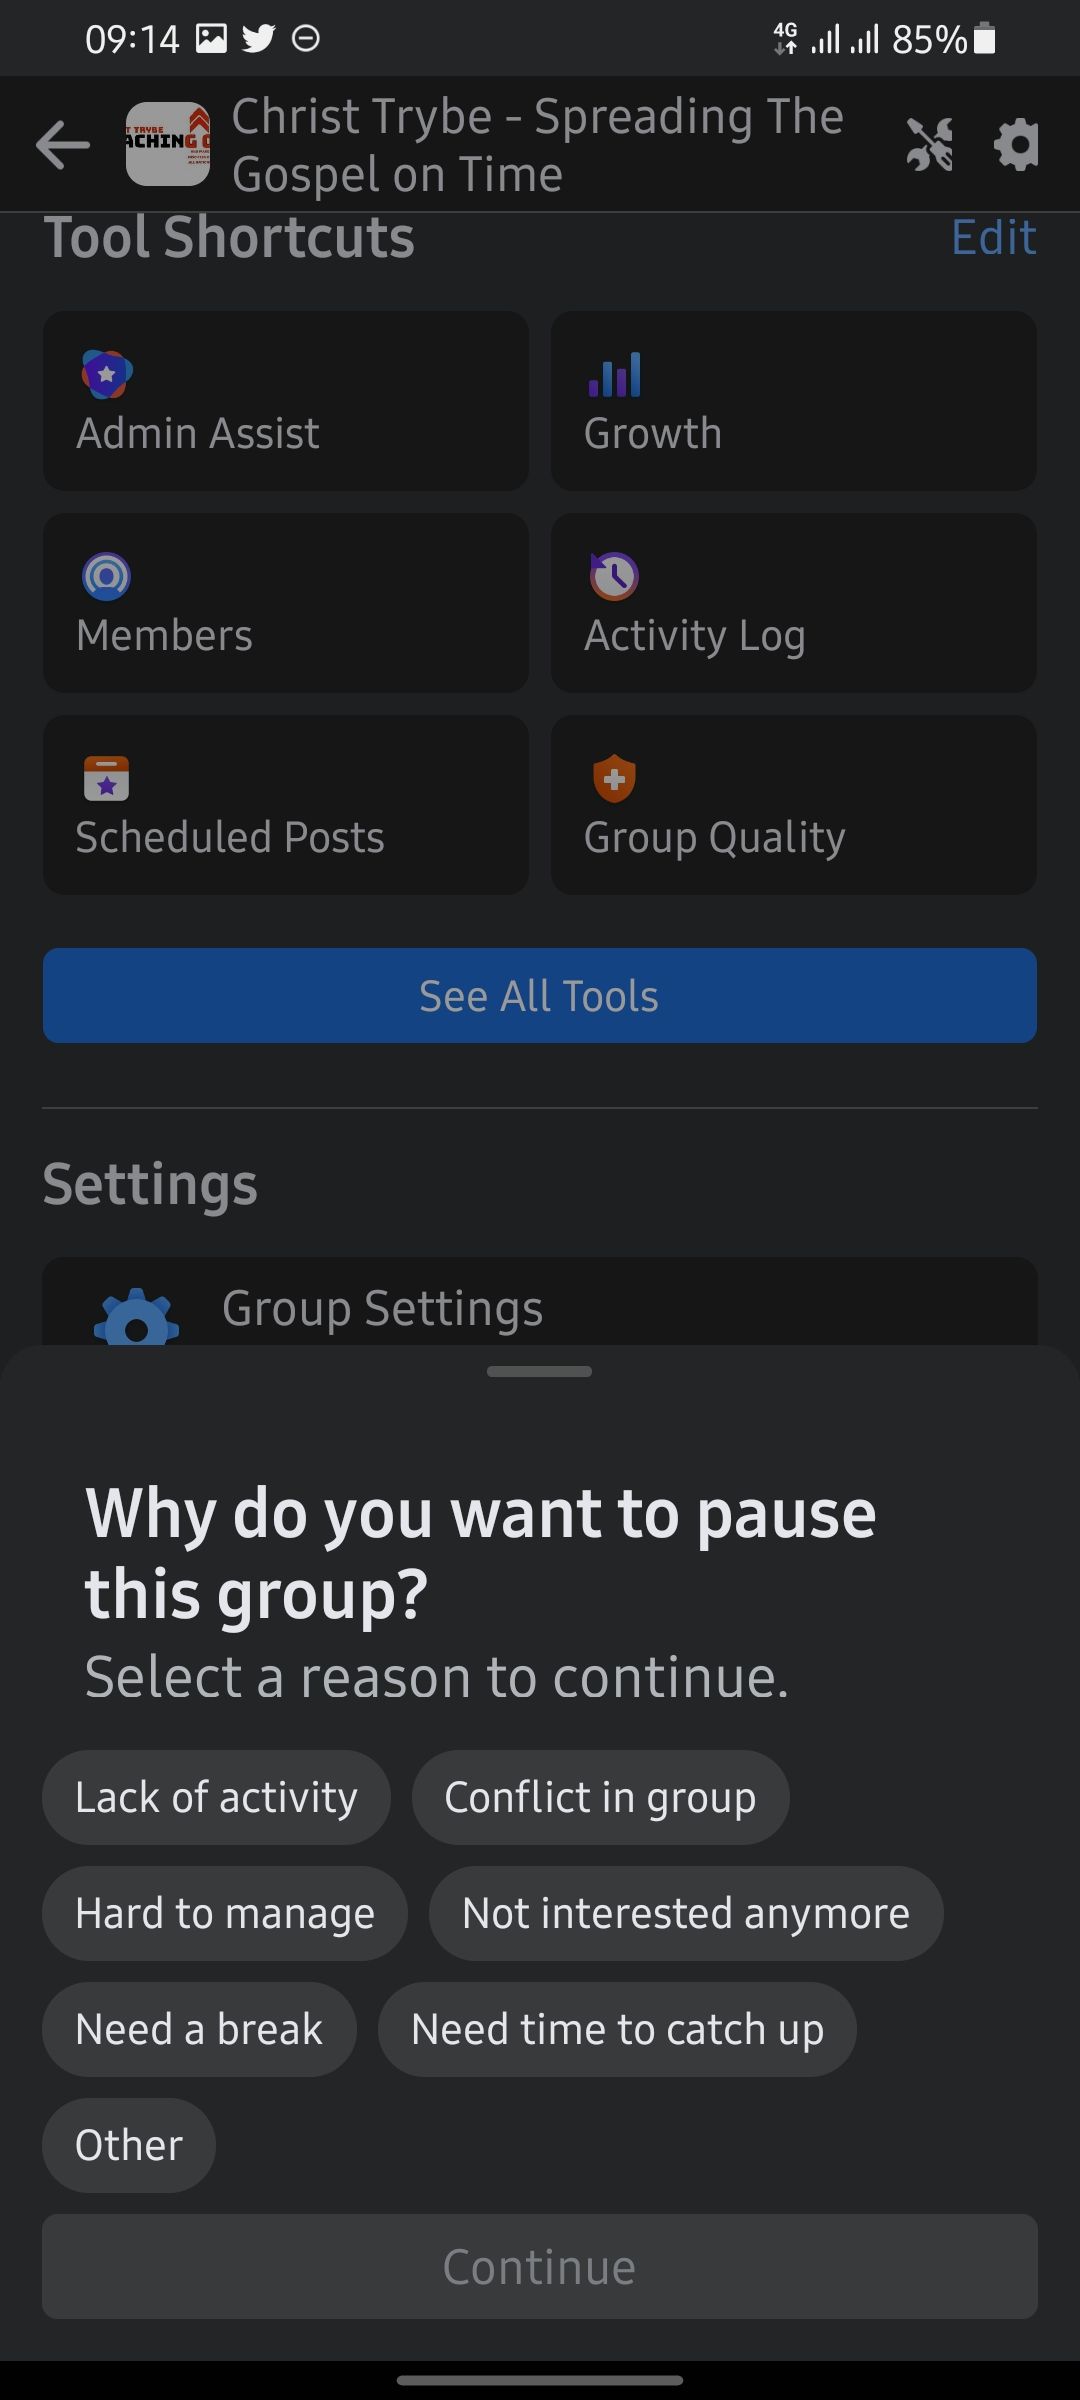
Close
If you want to pause your Facebook group on mobile, the process is simple.
- Launch your Facebook app and navigate to the group.
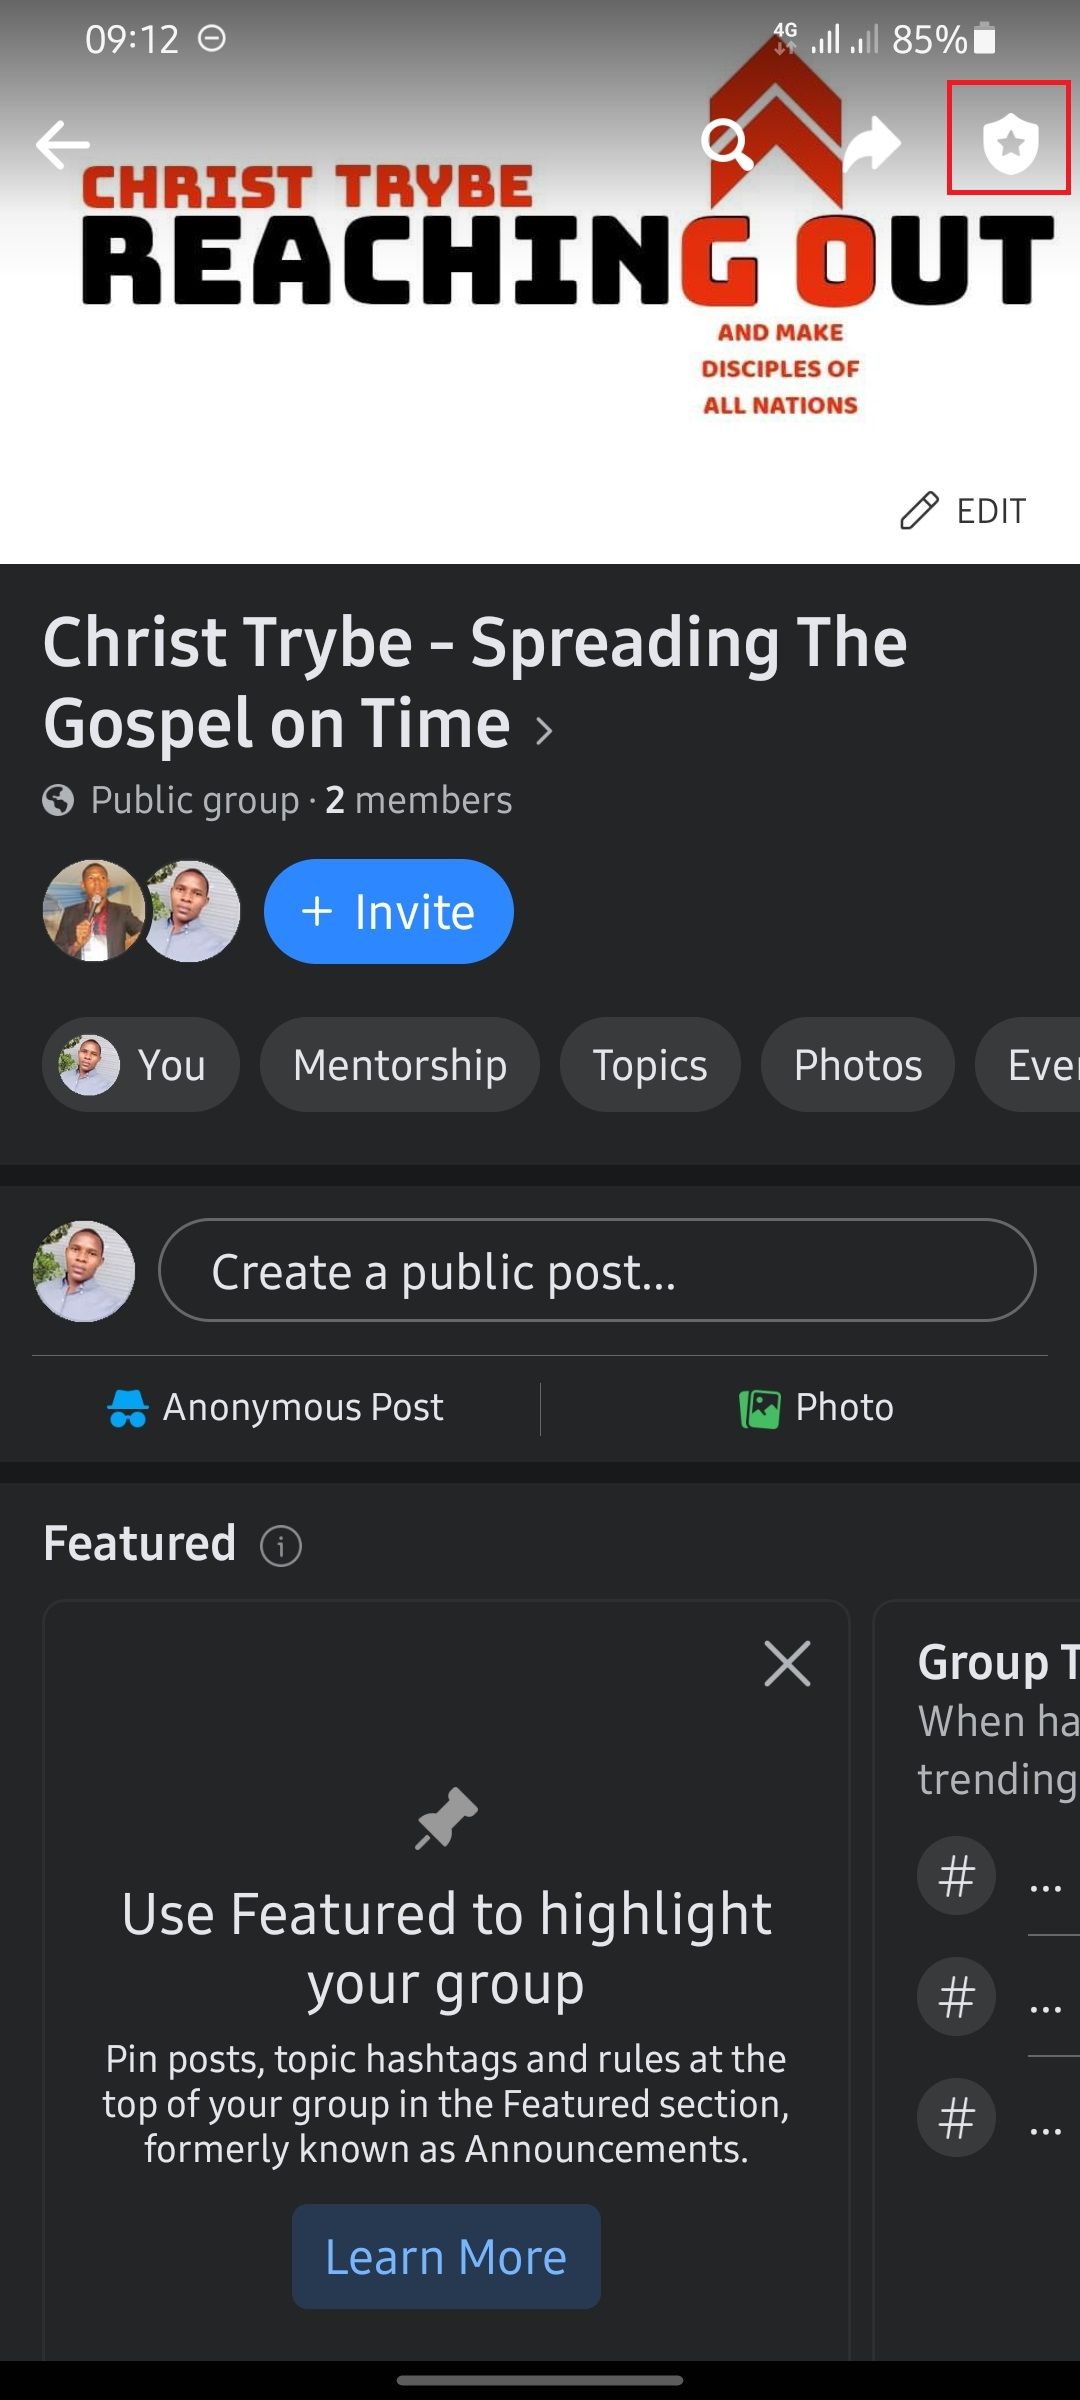
- Tap theshield icon to reveal the admin panel.
- Scroll down and tap thepause icon .
- Select the reason why you want to pause the group and tapContinue .
- Add an optional announcement to let members know why the group is being paused.
- TapPause Group to confirm.
How to Pause Your Group on the Web
Here’s how to pause your group on the web:
- Log in to Facebook on your browser, and navigate to the group you want to pause.
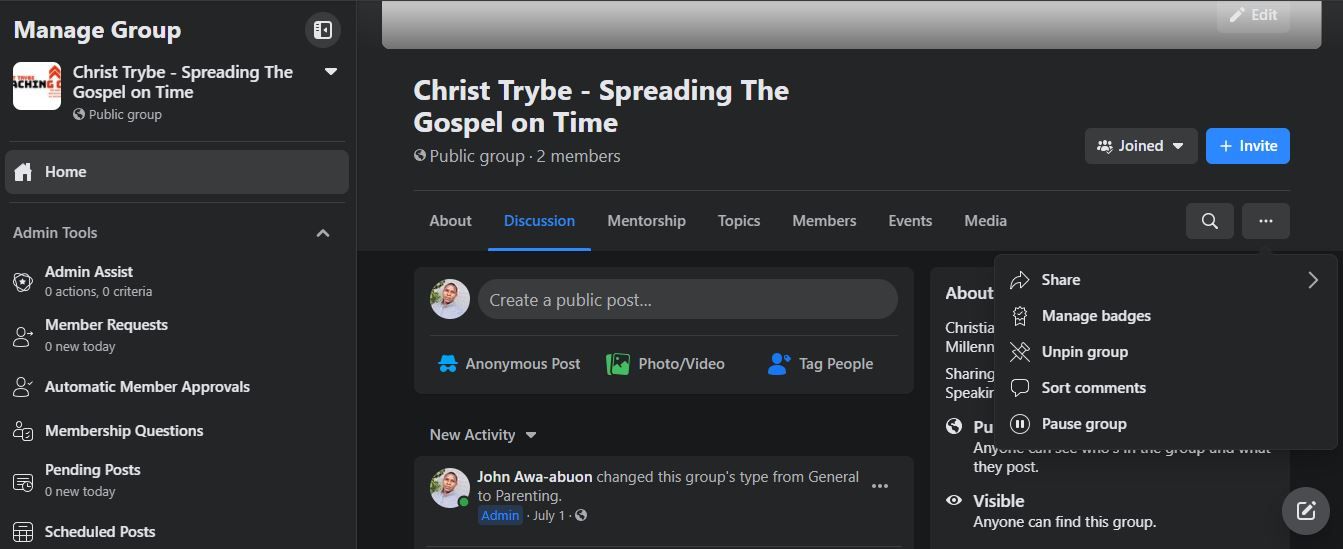
- Click on thethree dots in the group menu bar.
- SelectPause group .
- Select the reason why you want to pause the group and clickContinue .
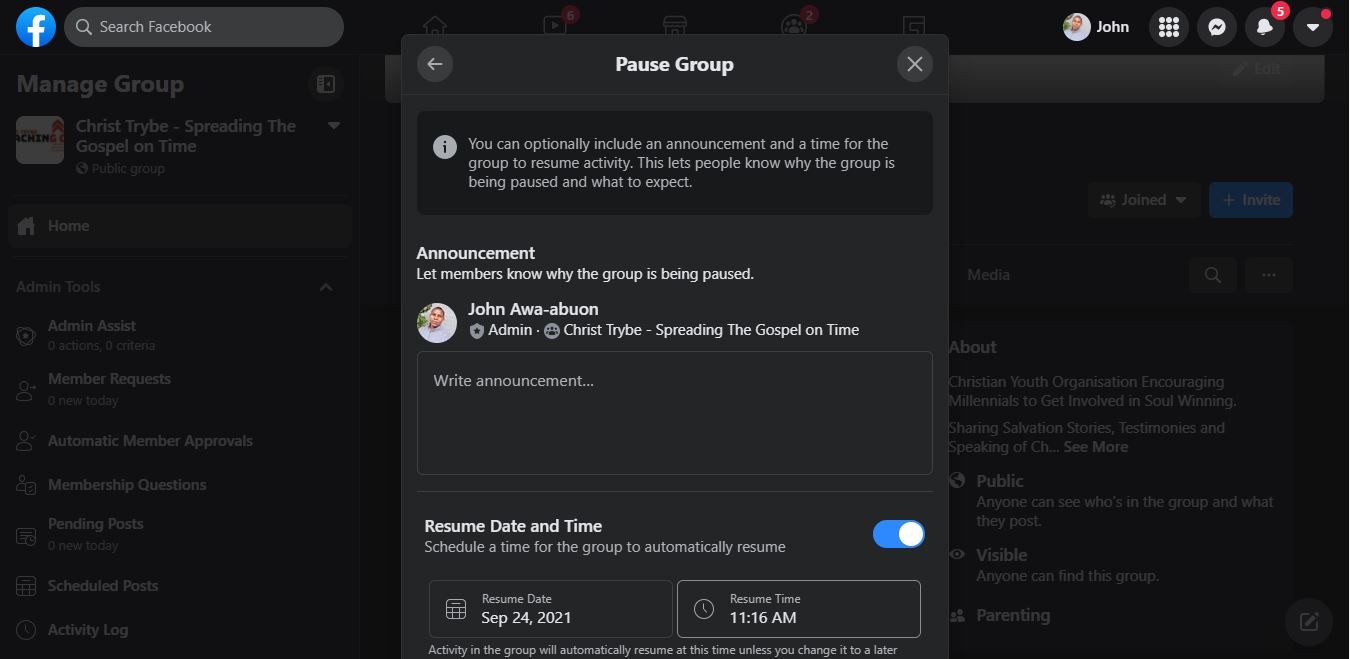
- Add an optional announcement to let members know why the group is paused and clickPause Group .
You can also set the group to auto-resume at a specified time, or leave it till when you’re ready. To resume the group, click thethree dots in the group menu bar and selectResume group .
If you’re just plain tired of the group or its members are just too inactive to be worth it anymore, you can go ahead and delete it. That’s assuming you don’t want to justleave the Facebook group .
How to Delete Your Facebook Group
It’s possible to delete your Facebook group, but it isn’t an easy process. This is because it requires you to first empty the group of members.
This makes it a tedious process for larger groups.
How to Delete Your Facebook Group on Mobile
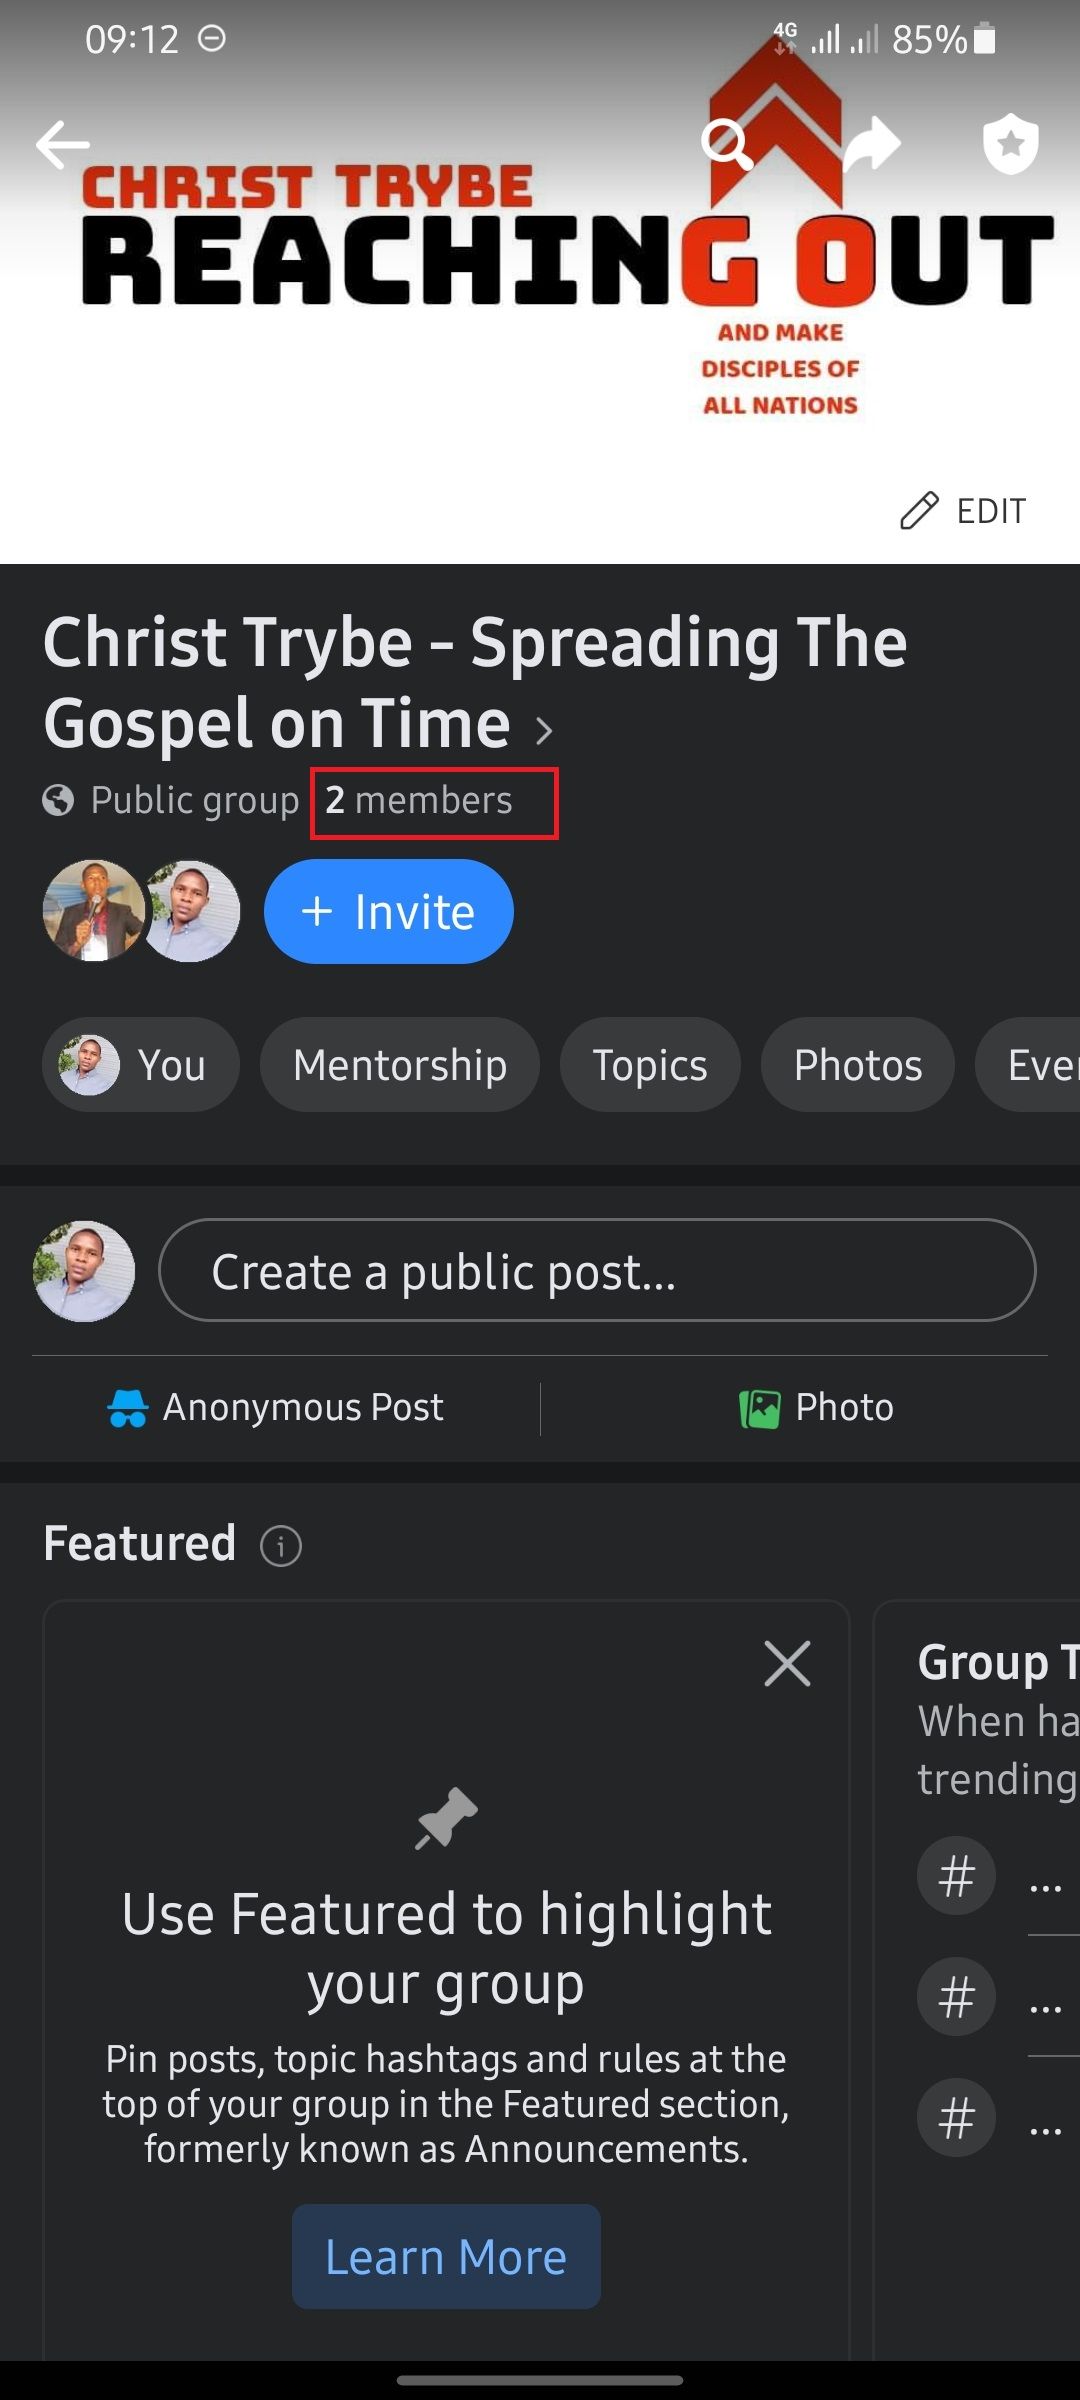
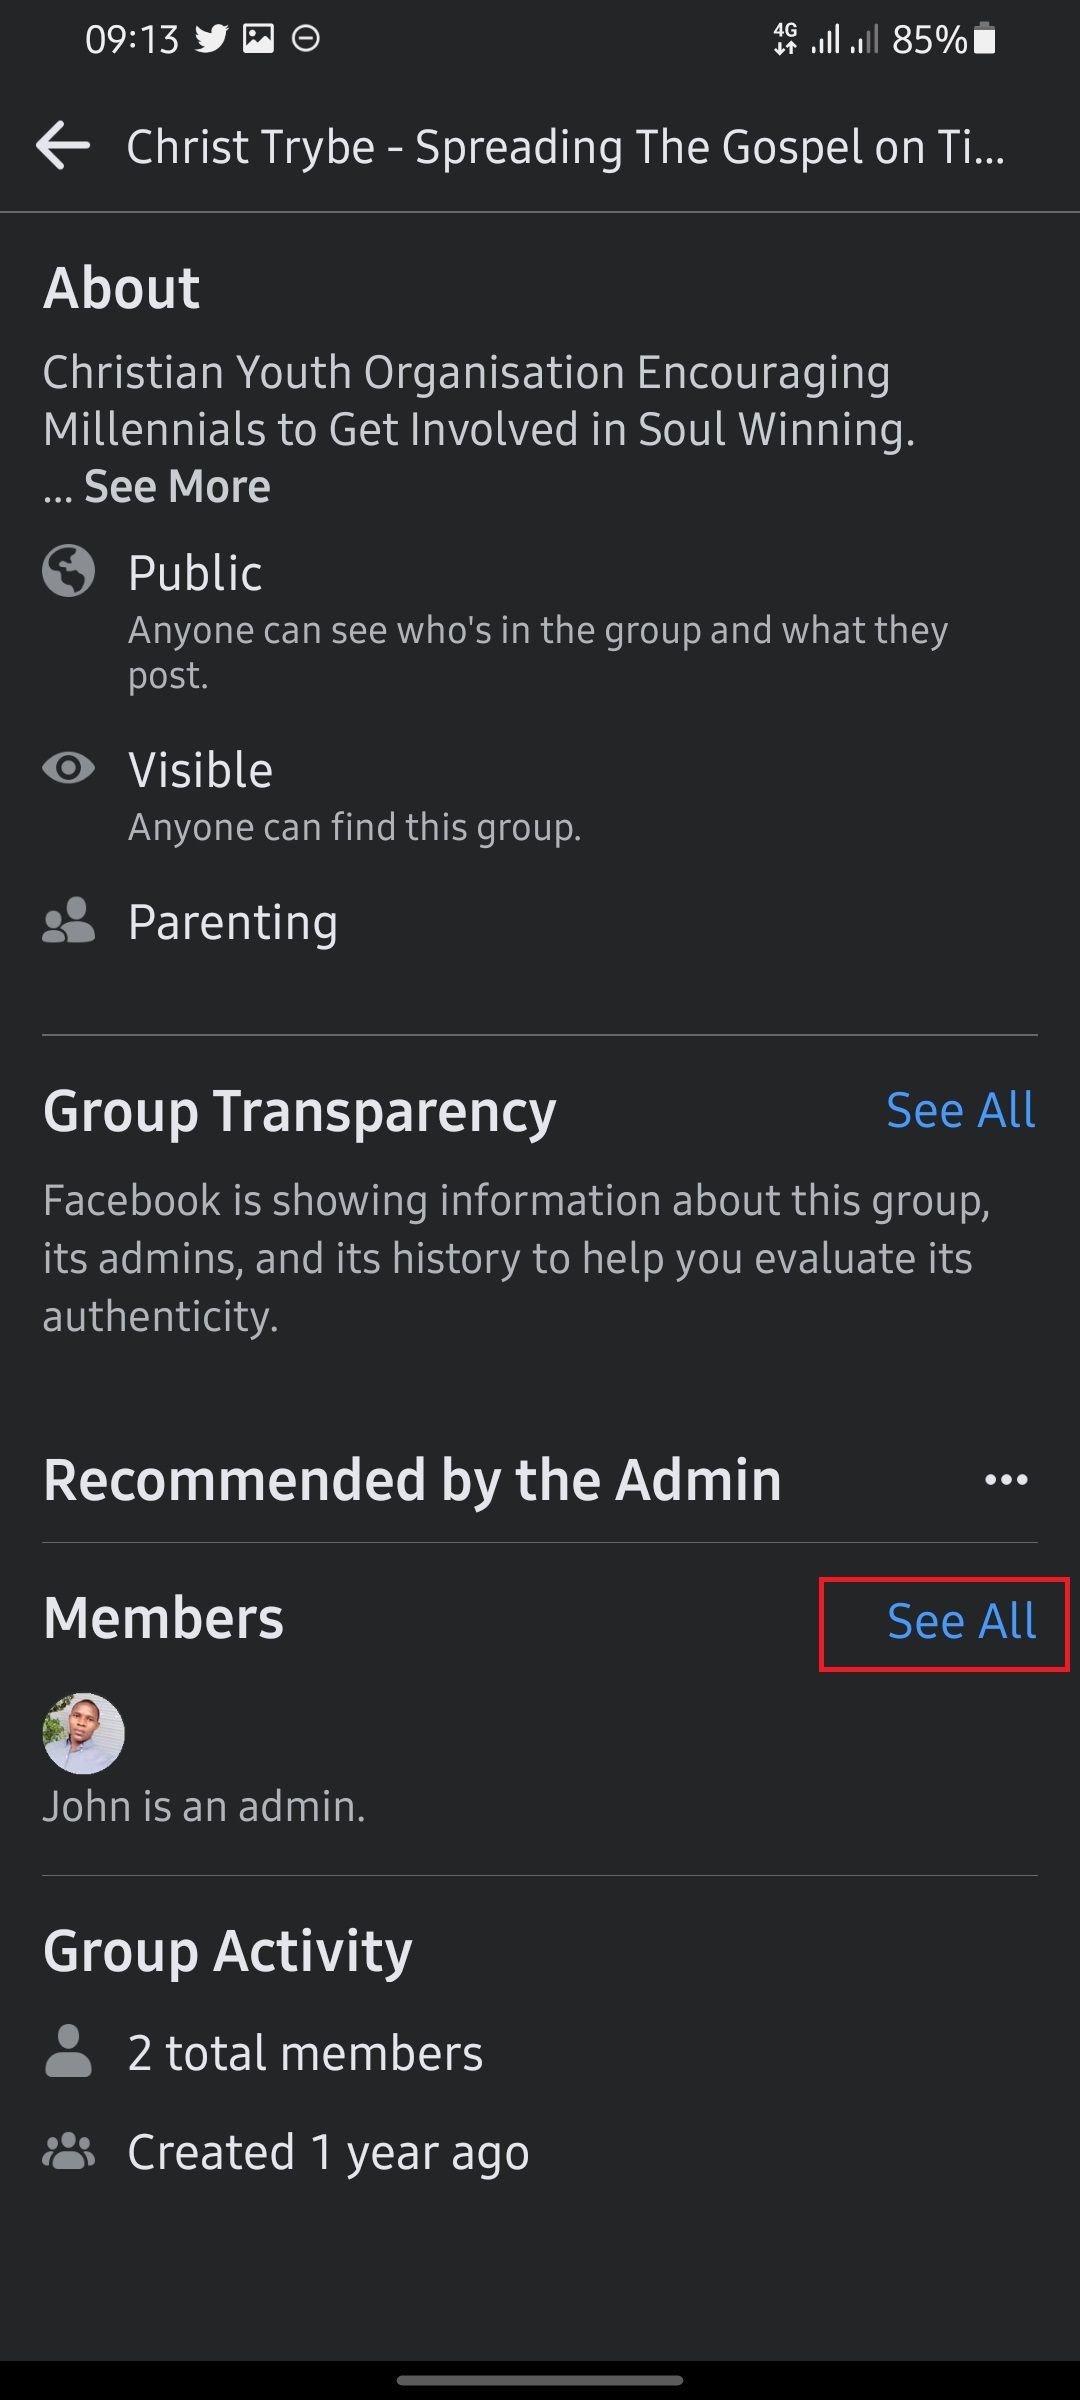
Close
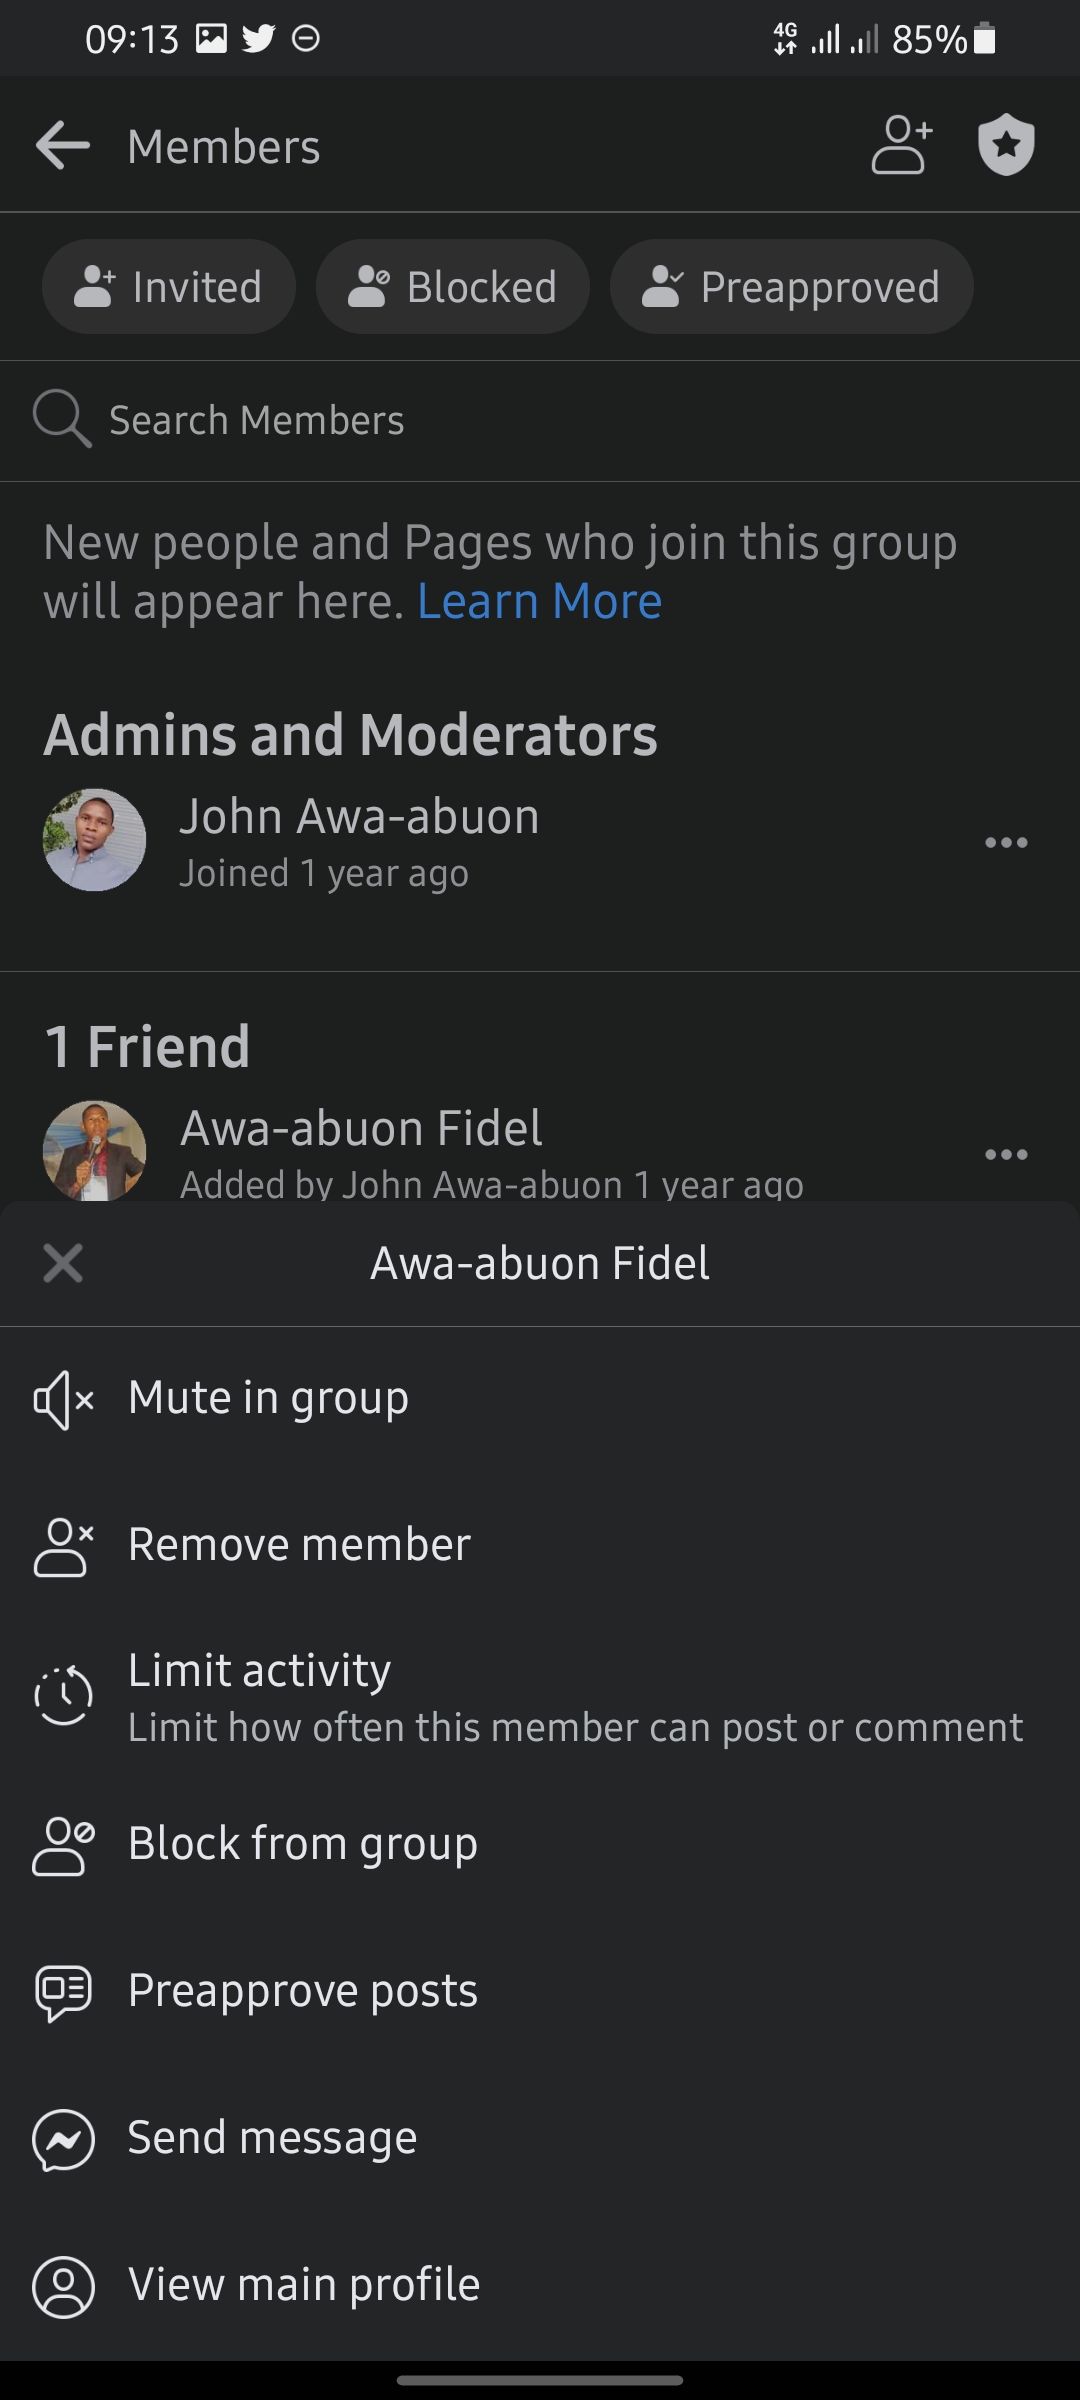
Follow these steps to delete your group on mobile:
- Login to your Facebook account.
- Navigate to the group you want to delete.
- Tap onMembers and selectSee all .
- Tap on thethree dots next to each member’s name and selectRemove Member .
- Confirm Removal.
- Once you’re done removing other members, tap thethree dots next to your name and selectLeave group .
Facebook will automatically delete the group once there are no members in it.
How to Delete Your Facebook Group on the Web
If you’re accessing Facebook through your web browser, here’s how to delete your group:
- Log in to Facebook and navigate to the group you want to delete.
- Click onMembers .
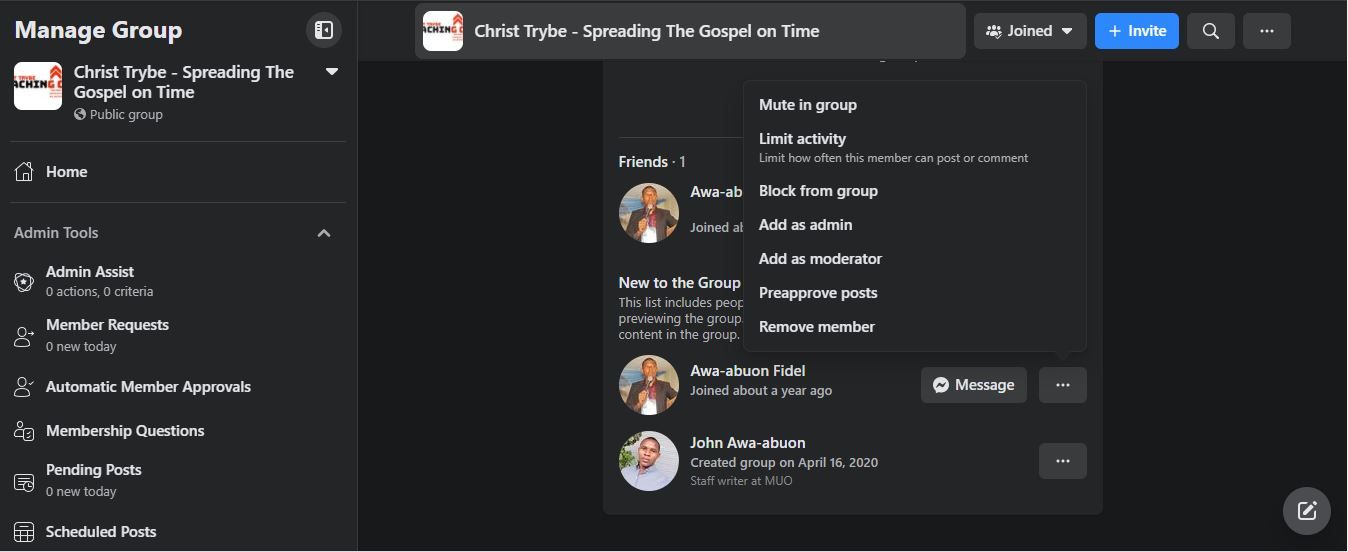
- Click thethree dots next to each member’s name and selectRemove Member .
- Once you’re done removing other members, click the three dots next to your name and selectLeave group .
- ClickLeave Group to confirm.
Again, once the group is empty, Facebook will delete it.
Can I Archive My Group Instead?
Facebook used to allow admins who needed a break from managing their groups to archive it. When a Group is archived, members can’t make new posts, comment, or react to existing posts: they’ll only be able to view already published content.
Related:How to Appear Offline and Invisible on Facebook and Messenger
However, Facebook has removed the archive group option. If you need a break from your group, you’ll have to choose between pausing or permanently deleting the group.
What Happens When You Delete a Facebook Group?
Deleting a group is a permanent action that can’t be reversed. Once you remove every member and yourself from the group, Facebook instantly deletes all posts, files, comments, and reactions shared in the group.
Be sure you want to delete the group before going this far because at this point there’s no going back.
Also read:
- [Updated] 2024 Approved Monetizing Your YouTube Channels Strategies for Success
- [Updated] Avoiding Lost Sequences with OBS Fixes
- [Updated] In 2024, Unlock Zoom’s Full Power with Share Screen Expertise
- Browsing Like a Pro 5 Top Choices for Screen Capture Software
- Deciphering Social Media Etiquette: Follow Vs. Unfollow on Facebook
- Digital Dazzle: Transformative Techniques for Images
- Digital Image Editing Simplified Mastering the Art of Cropping
- Efficient Navigation Through Diverse Facebook Profiles
- Effortless Repair: Stellar’s QuickTime MOV Fixes
- In 2024, How to Stop Google Chrome from Tracking Your Location On Samsung Galaxy A15 5G? | Dr.fone
- In 2024, Top 5 Car Locator Apps for Apple iPhone 6s Plus | Dr.fone
- Title: The Ultimate Guide to Removing a Facebook Community
- Author: Michael
- Created at : 2025-02-25 20:30:12
- Updated at : 2025-03-04 16:53:16
- Link: https://facebook.techidaily.com/the-ultimate-guide-to-removing-a-facebook-community/
- License: This work is licensed under CC BY-NC-SA 4.0.
