Tutorial: Export Instagram Reels for Facebook Sharing

Tutorial: Export Instagram Reels for Facebook Sharing
Have you ever wanted to share an Instagram Reel with your Facebook friends and followers? Good news! You can do this, and it’s relatively simple. For those seeking to boost exposure or ensure family members see their content, sharing Reels from Instagram to Facebook is a fantastic option.
Let’s explore how you can share Instagram Reels to Facebook both before and after posting. But first, you’ll need to link your Facebook and Instagram accounts.
How to Link Facebook and Instagram
Sharing your Instagram Reels on Facebook is an excellent way to leverage both platforms’ audiences, especially since Instagram’s Reels feature has become so vital. Meta has also introduced the option to create Reels on Facebook .
However, you may prefer to share your current or future Instagram content as Reels on Facebook, rather than navigating the new creation tools and starting from scratch on the platform.
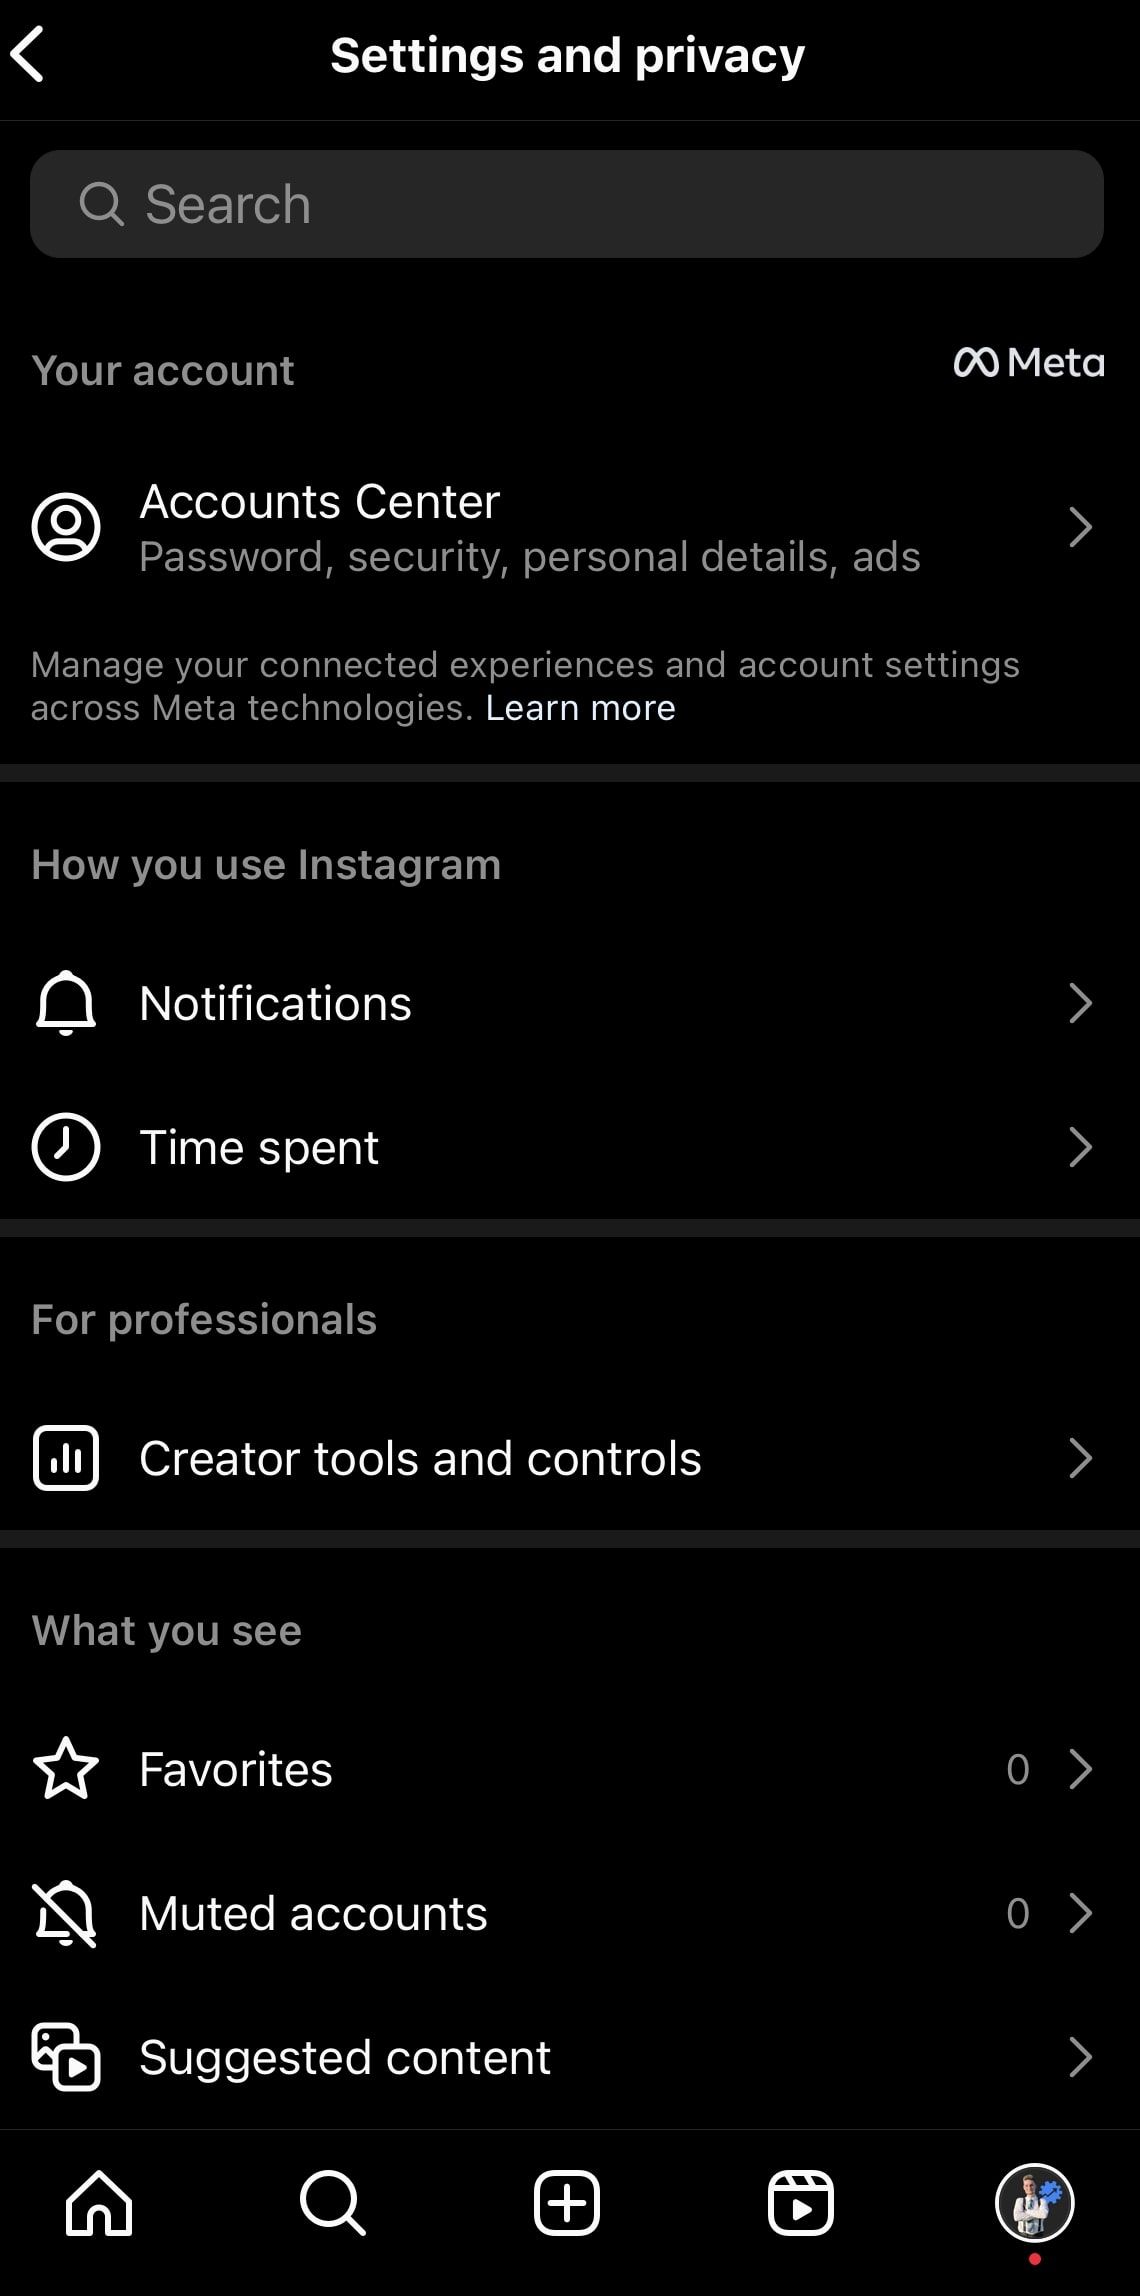
You’ll need to ensure that your Facebook is linked to your Instagram.The Account Center is a hub introduced by Meta to enhance the integration between Facebook and Instagram.
To link your accounts, follow these steps:
Close
1. On Instagram, navigate toSettings and privacy .
2. Select the first option,Accounts Center .
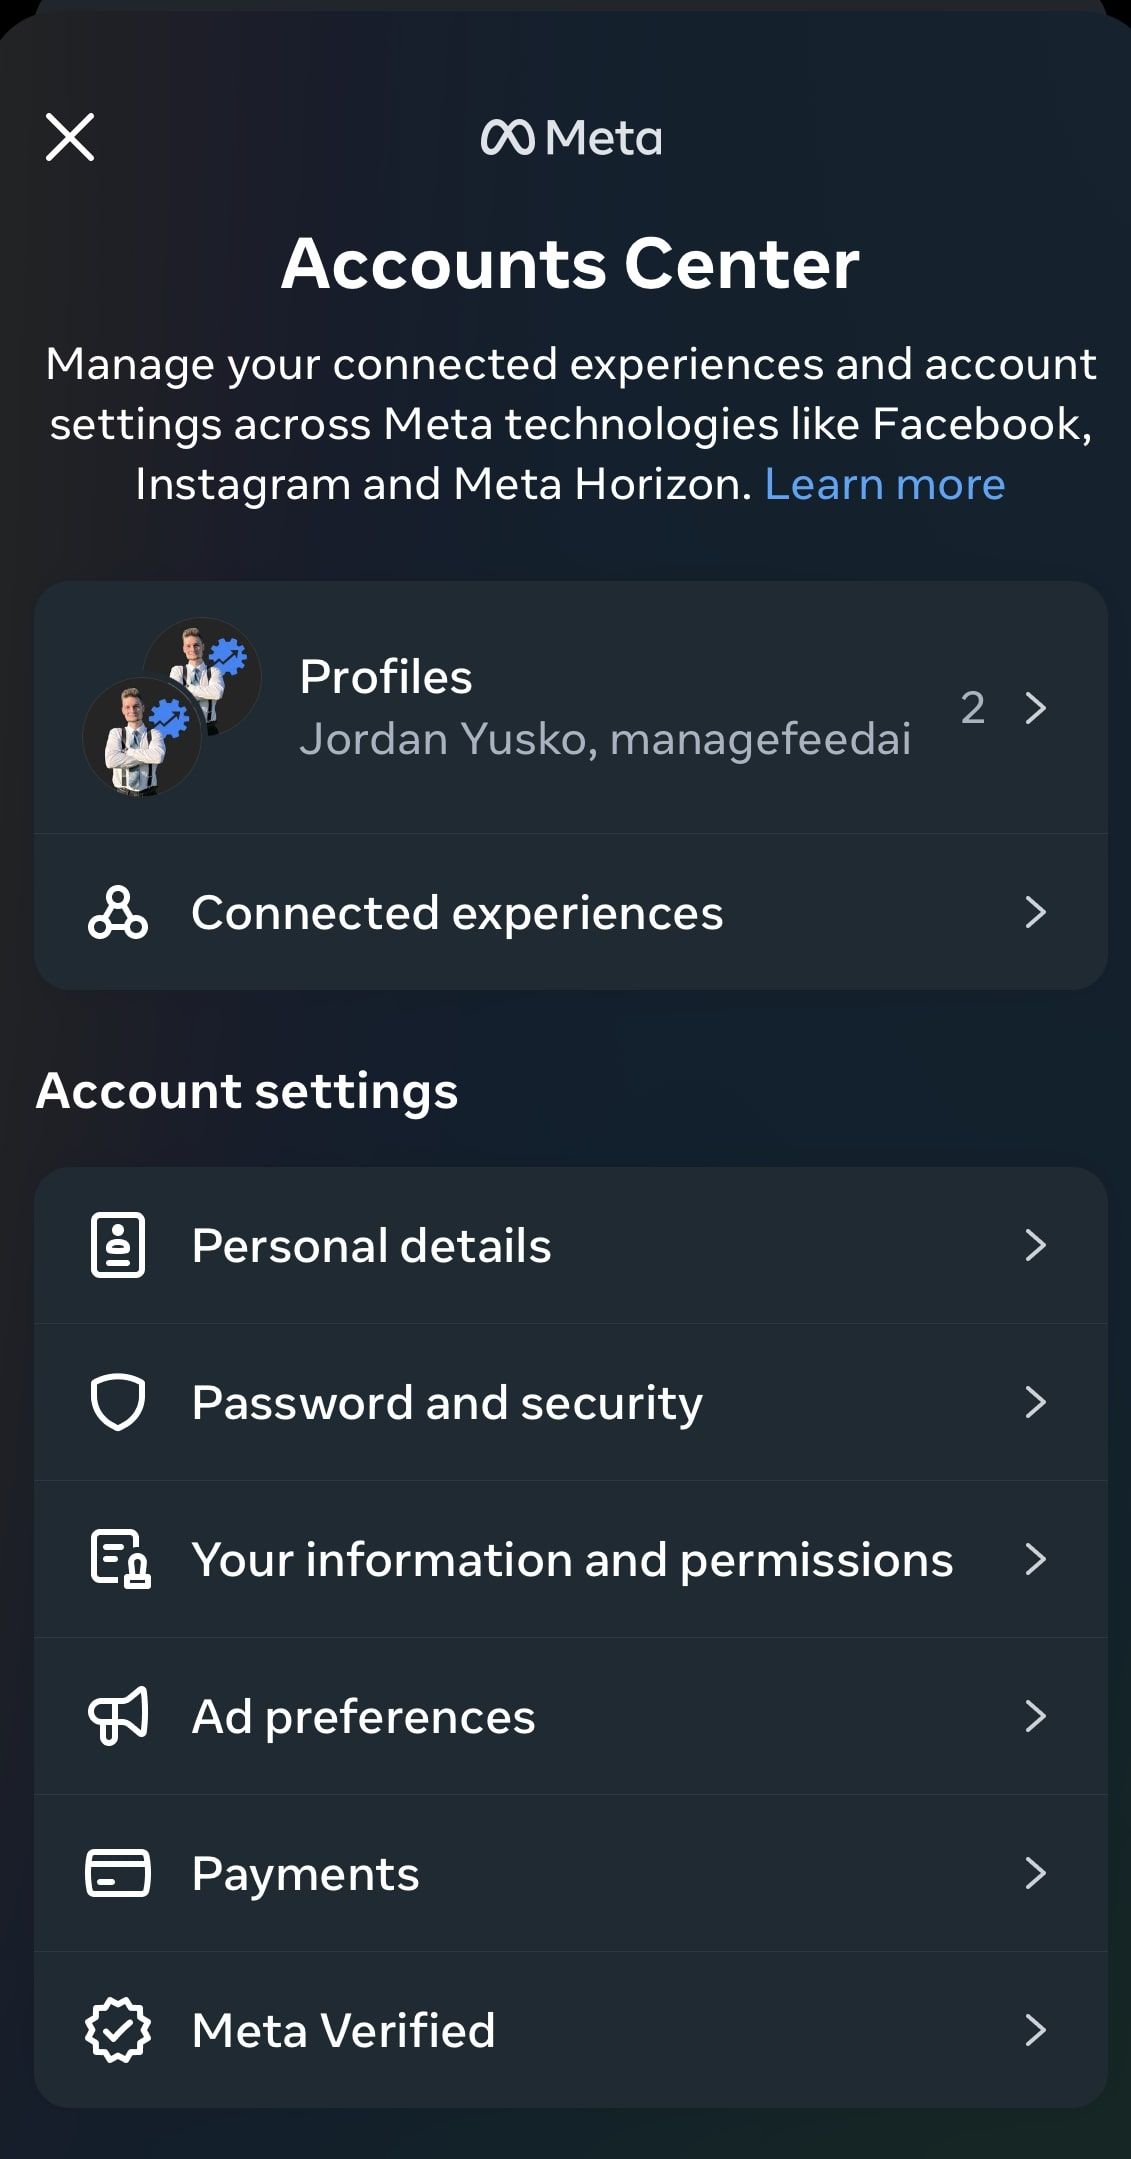
3. TapProfiles .
4. Then chooseAdd accounts .
- Select the account you would like to tapContinue .
6. ChooseYes, finish adding .
You will see both accounts listed underProfiles indicating that they have been connected.
How to Share an Instagram Reel Before Posting
You may choose to share your Reel prior to posting it, and there are two methods to achieve this. The first method gives you the choice of sharing to Facebook before uploading each Reel. The second method will automatically upload your Reels to Facebook, each time you post.
To share a specific Reel to Facebook before posting, follow these steps:
Close
1. Create or upload your Instagram Reel.
2. Edit your Reel. Be careful, as music in your Instagram Reel might limit sharing to Facebook.
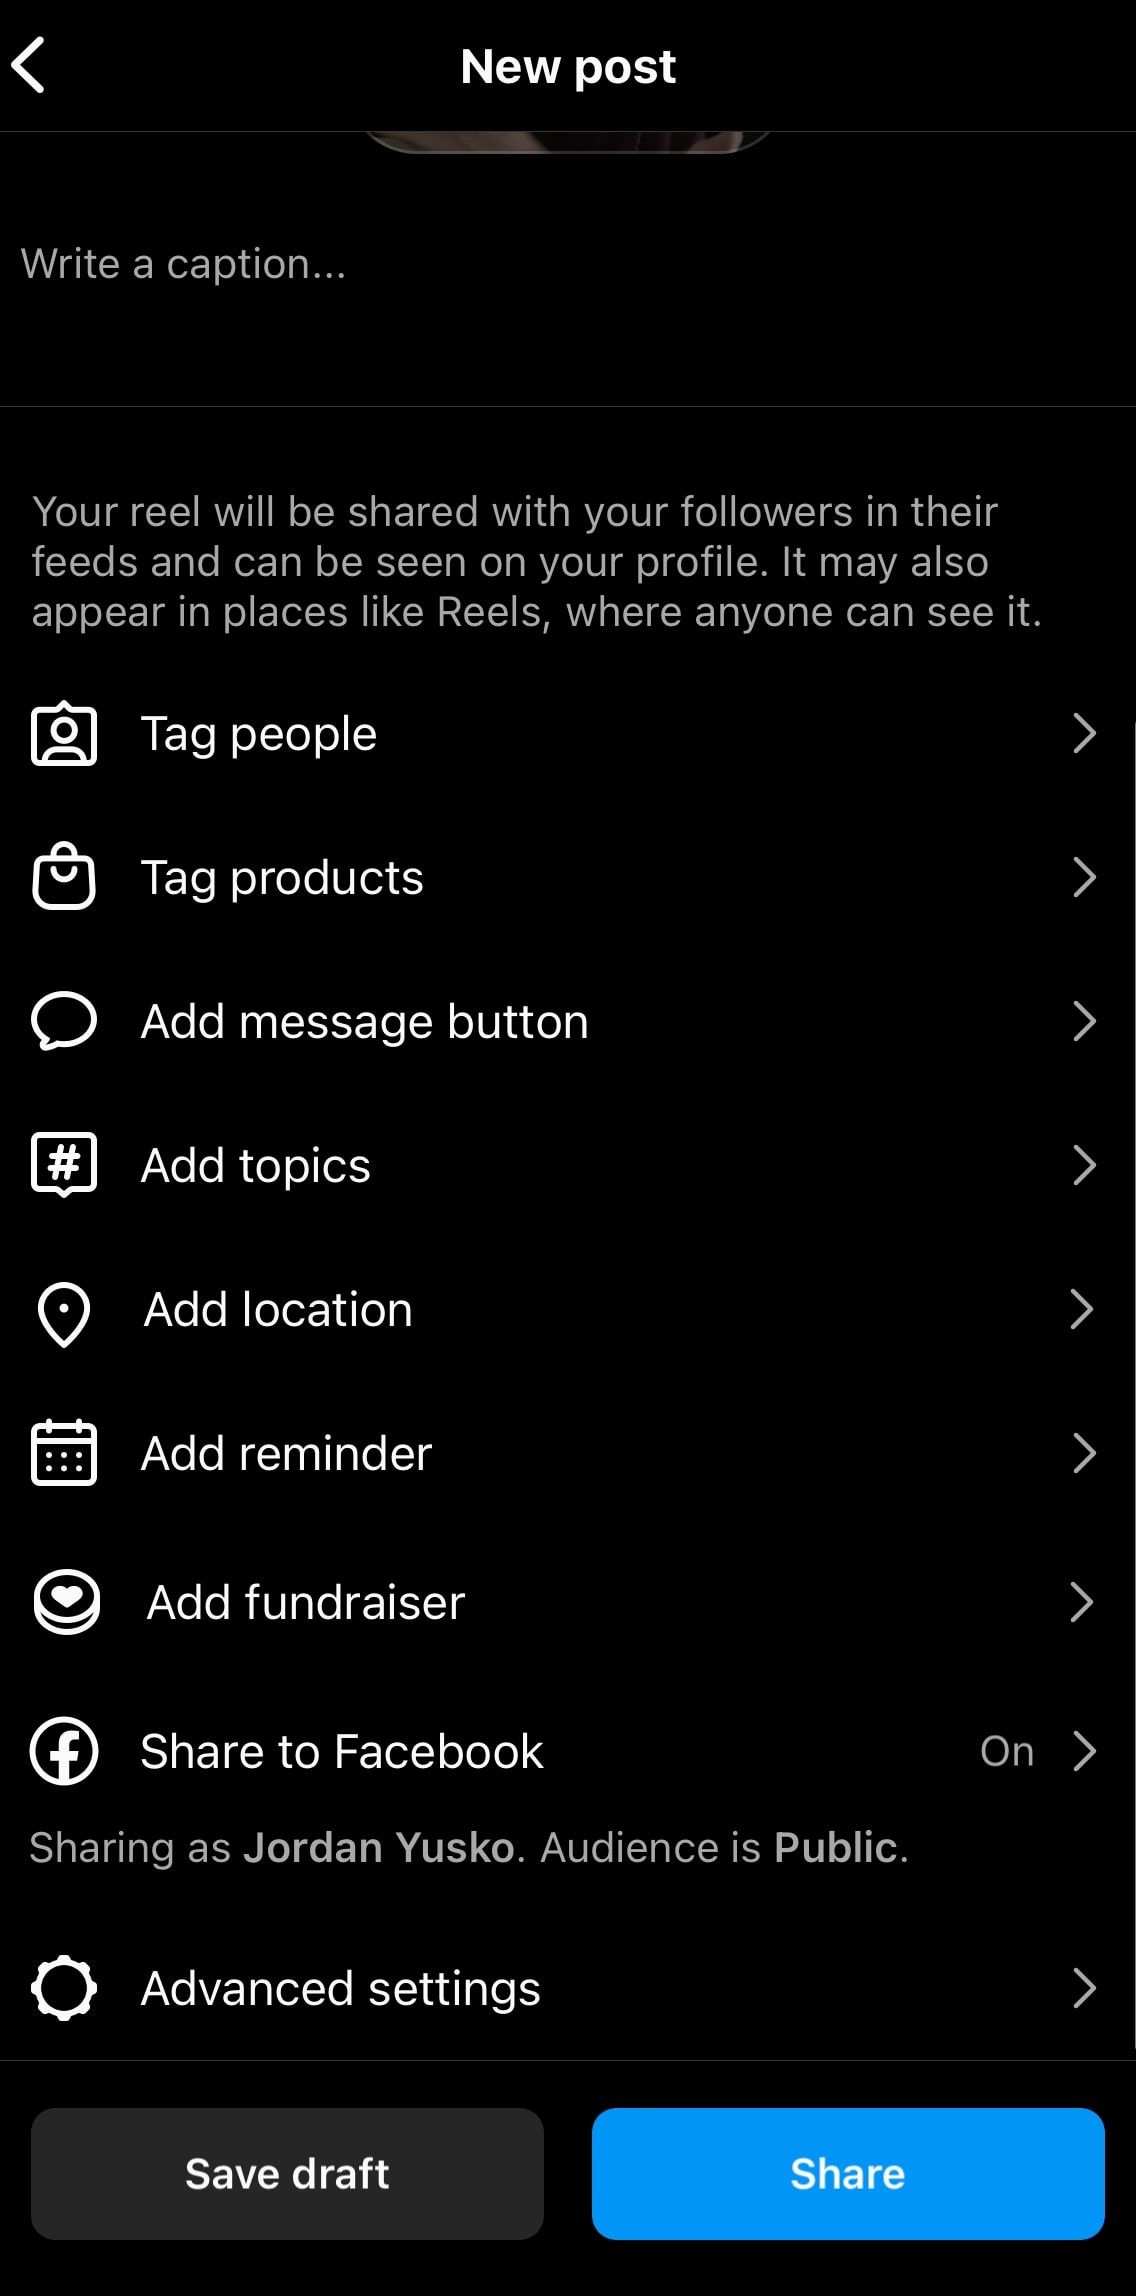
3. TapNext .
3. Scroll down and toggle onShare to Facebook .
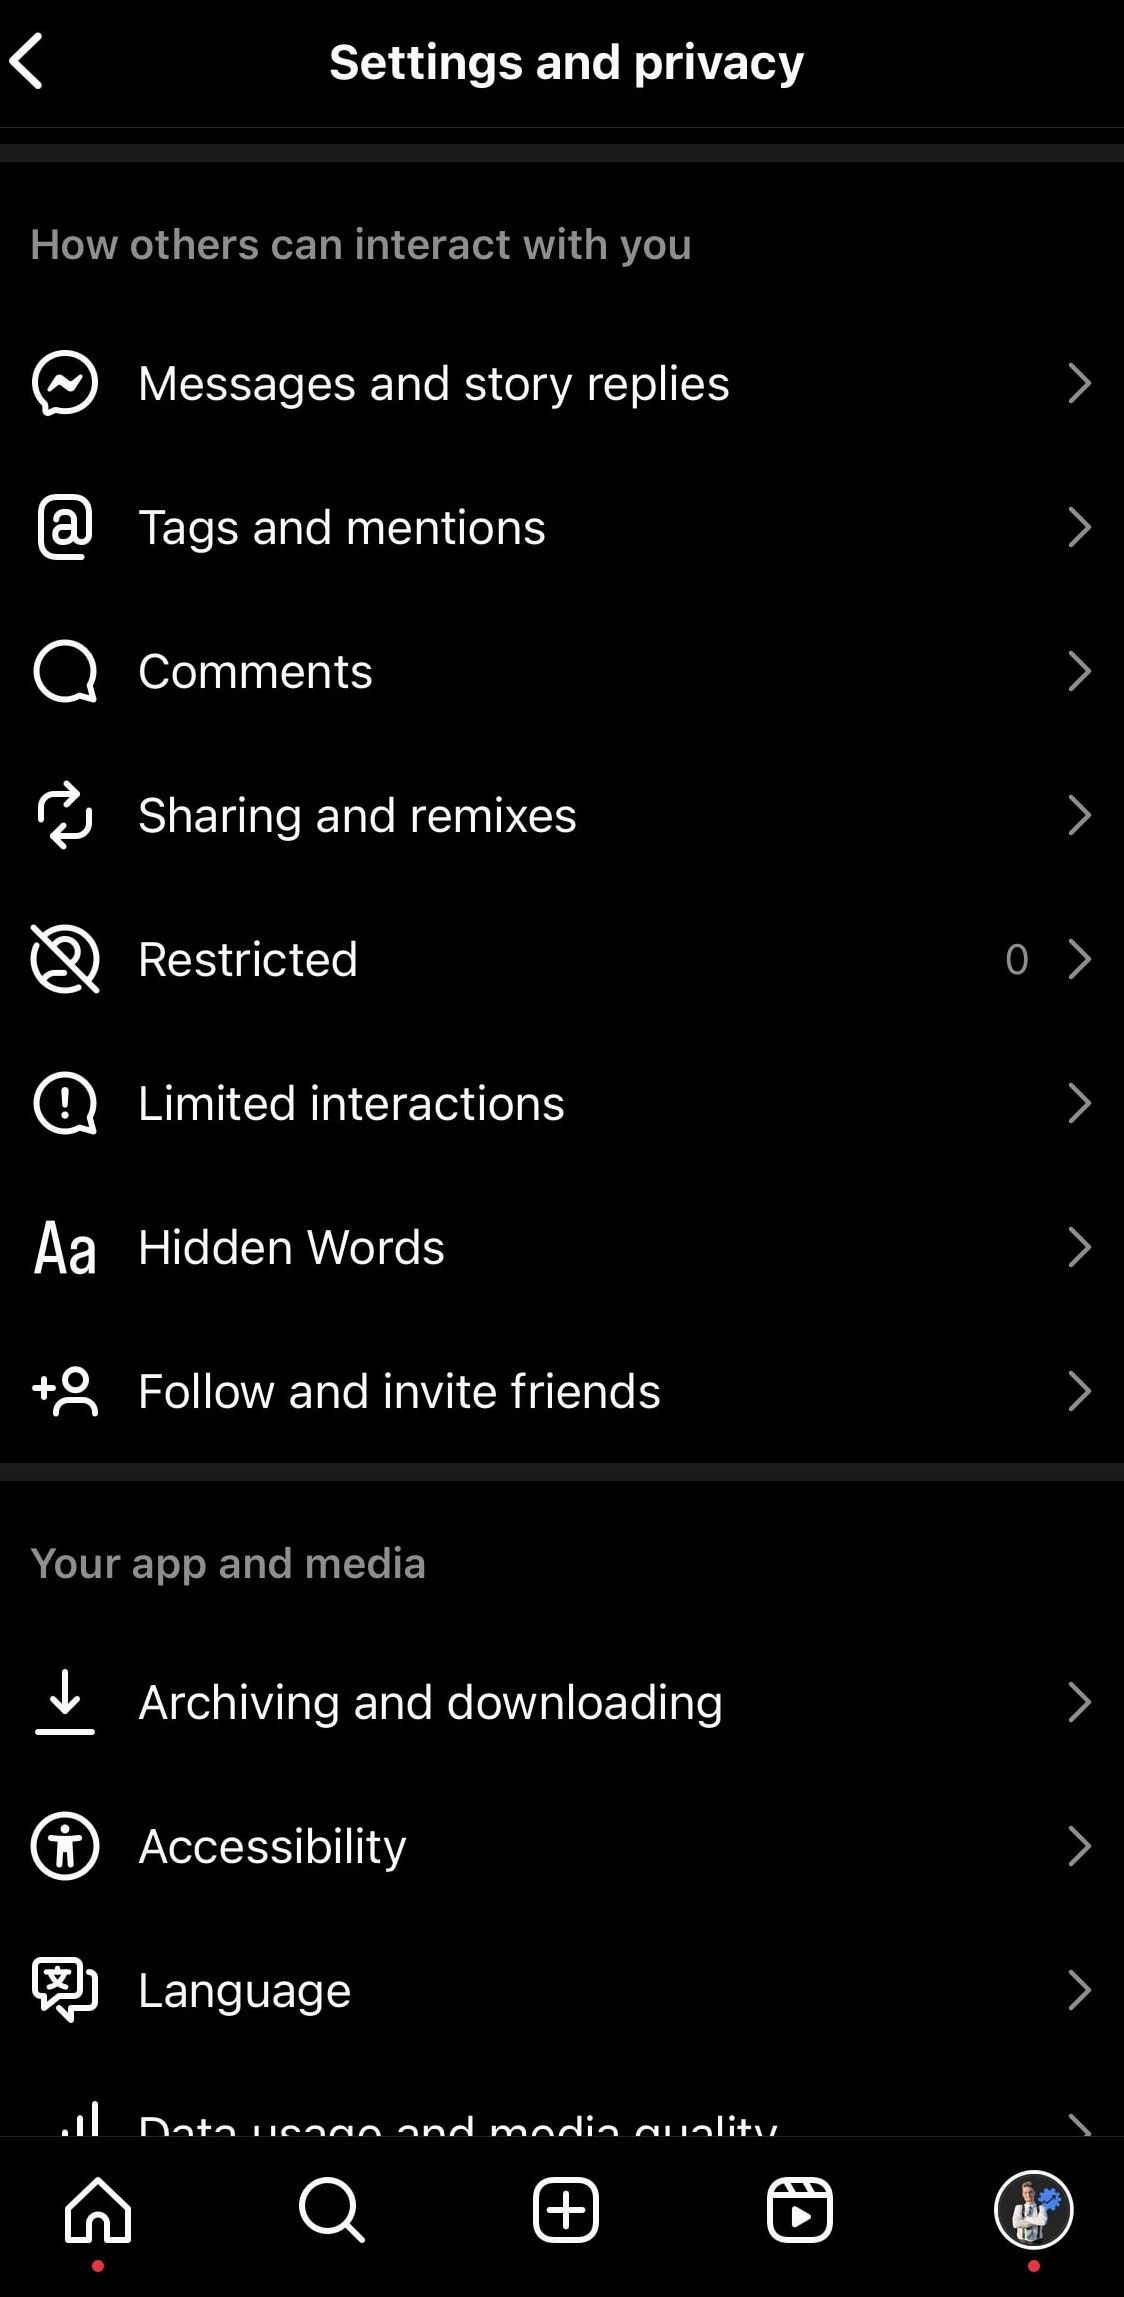
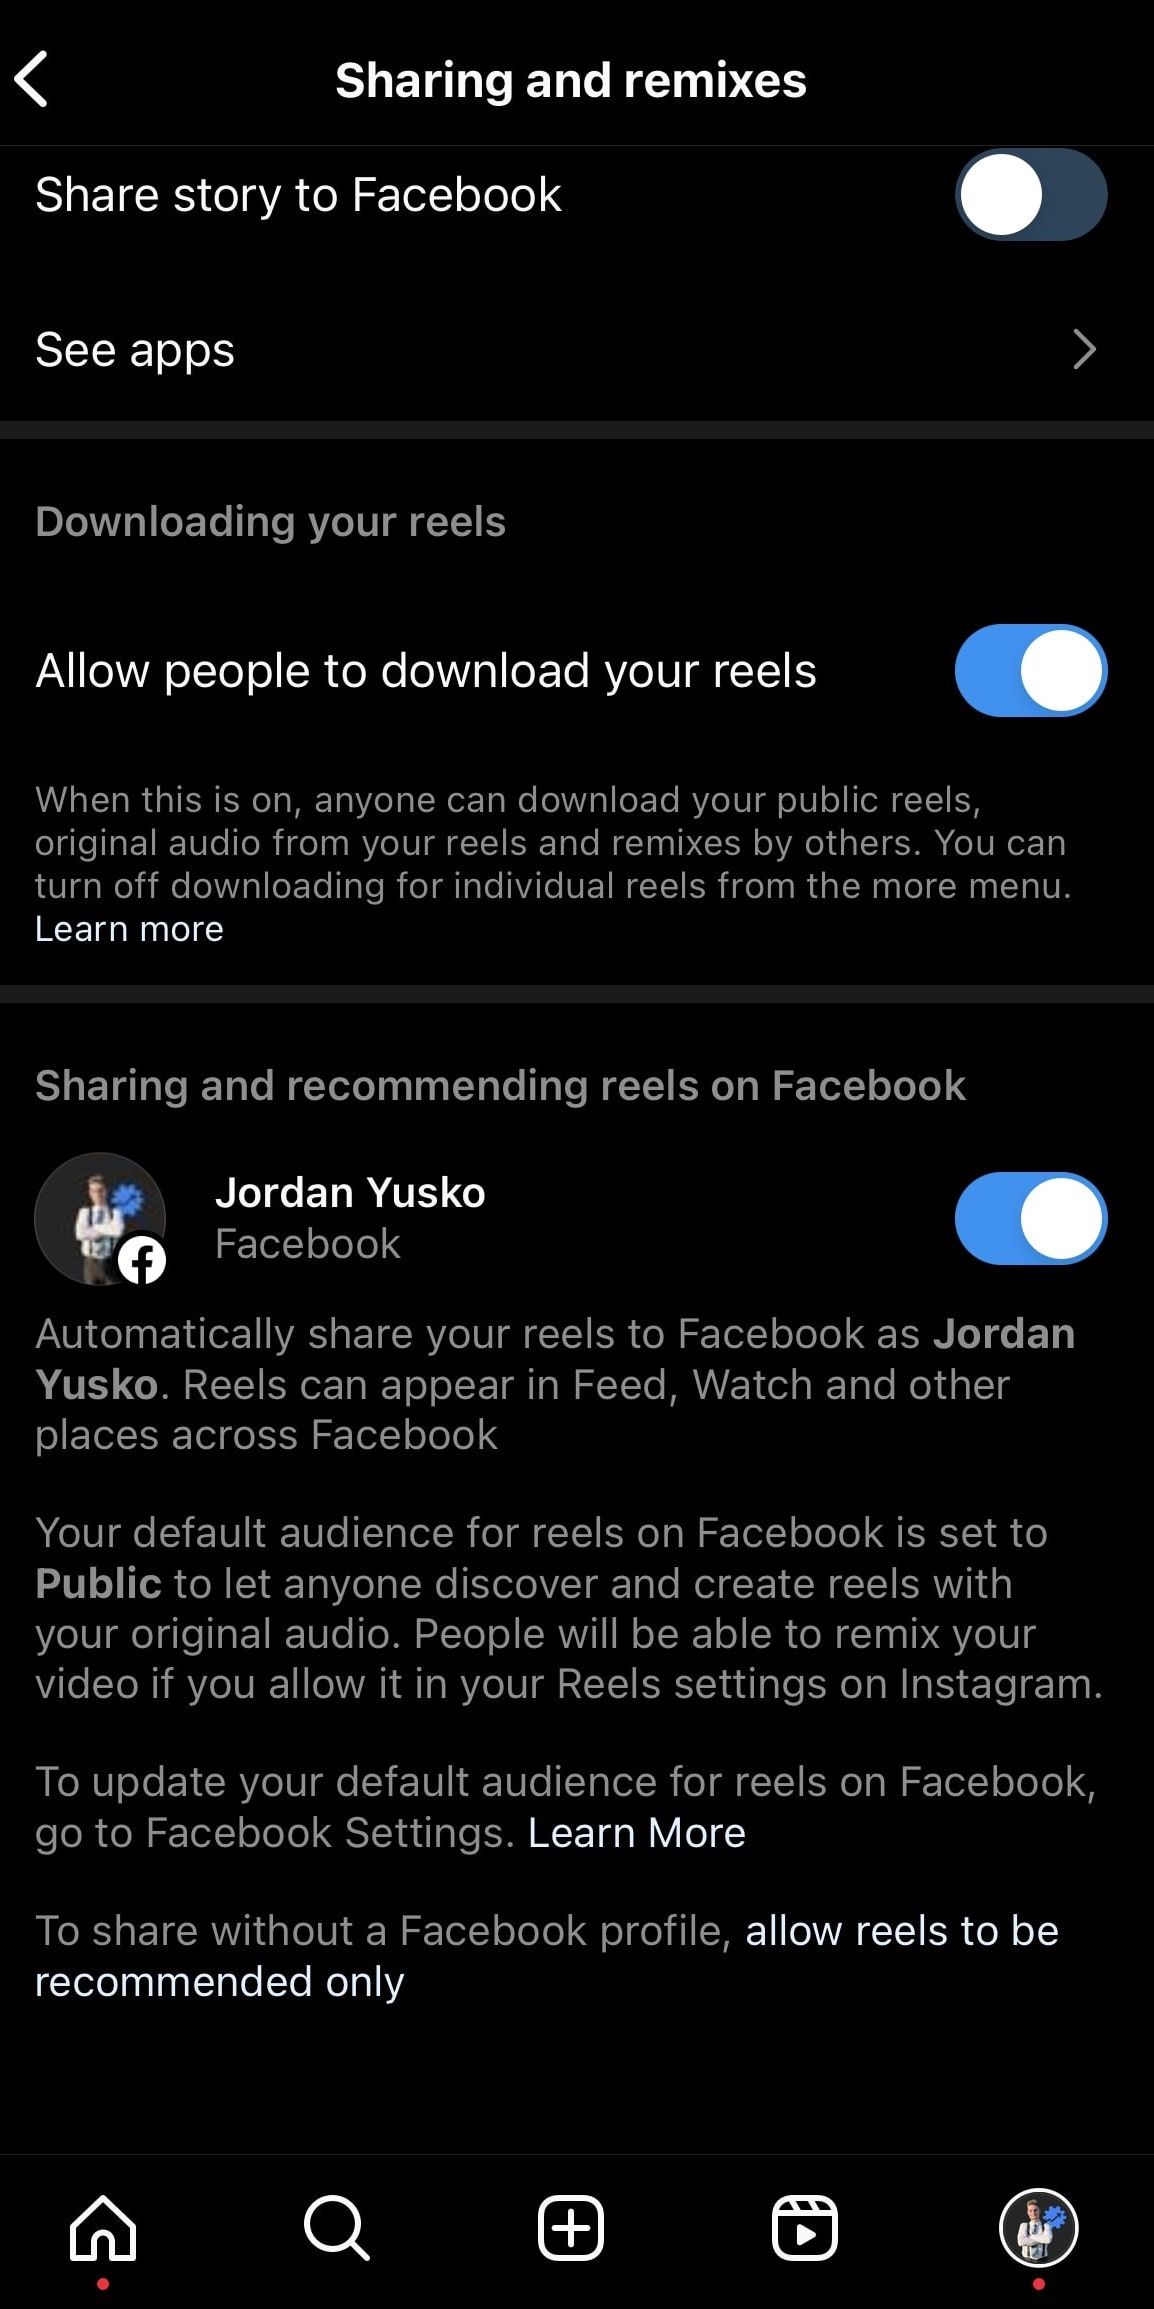
You can also enable Reels to share to Facebook automatically, each time you post.
To do this, use these steps:
Close
1. Go toSettings and privacy.
2. Then, navigate toSharing and remixes.
3. ToggleOn theSharing and recommending reels on Facebook option.
How to Share an Instagram Reel After Posting
If you’re looking to share your Reel after you’ve already uploaded it to Instagram, you still have the ability to do this. The integration between the two platforms ensures a seamless experience, making it easier to maximize your reach.
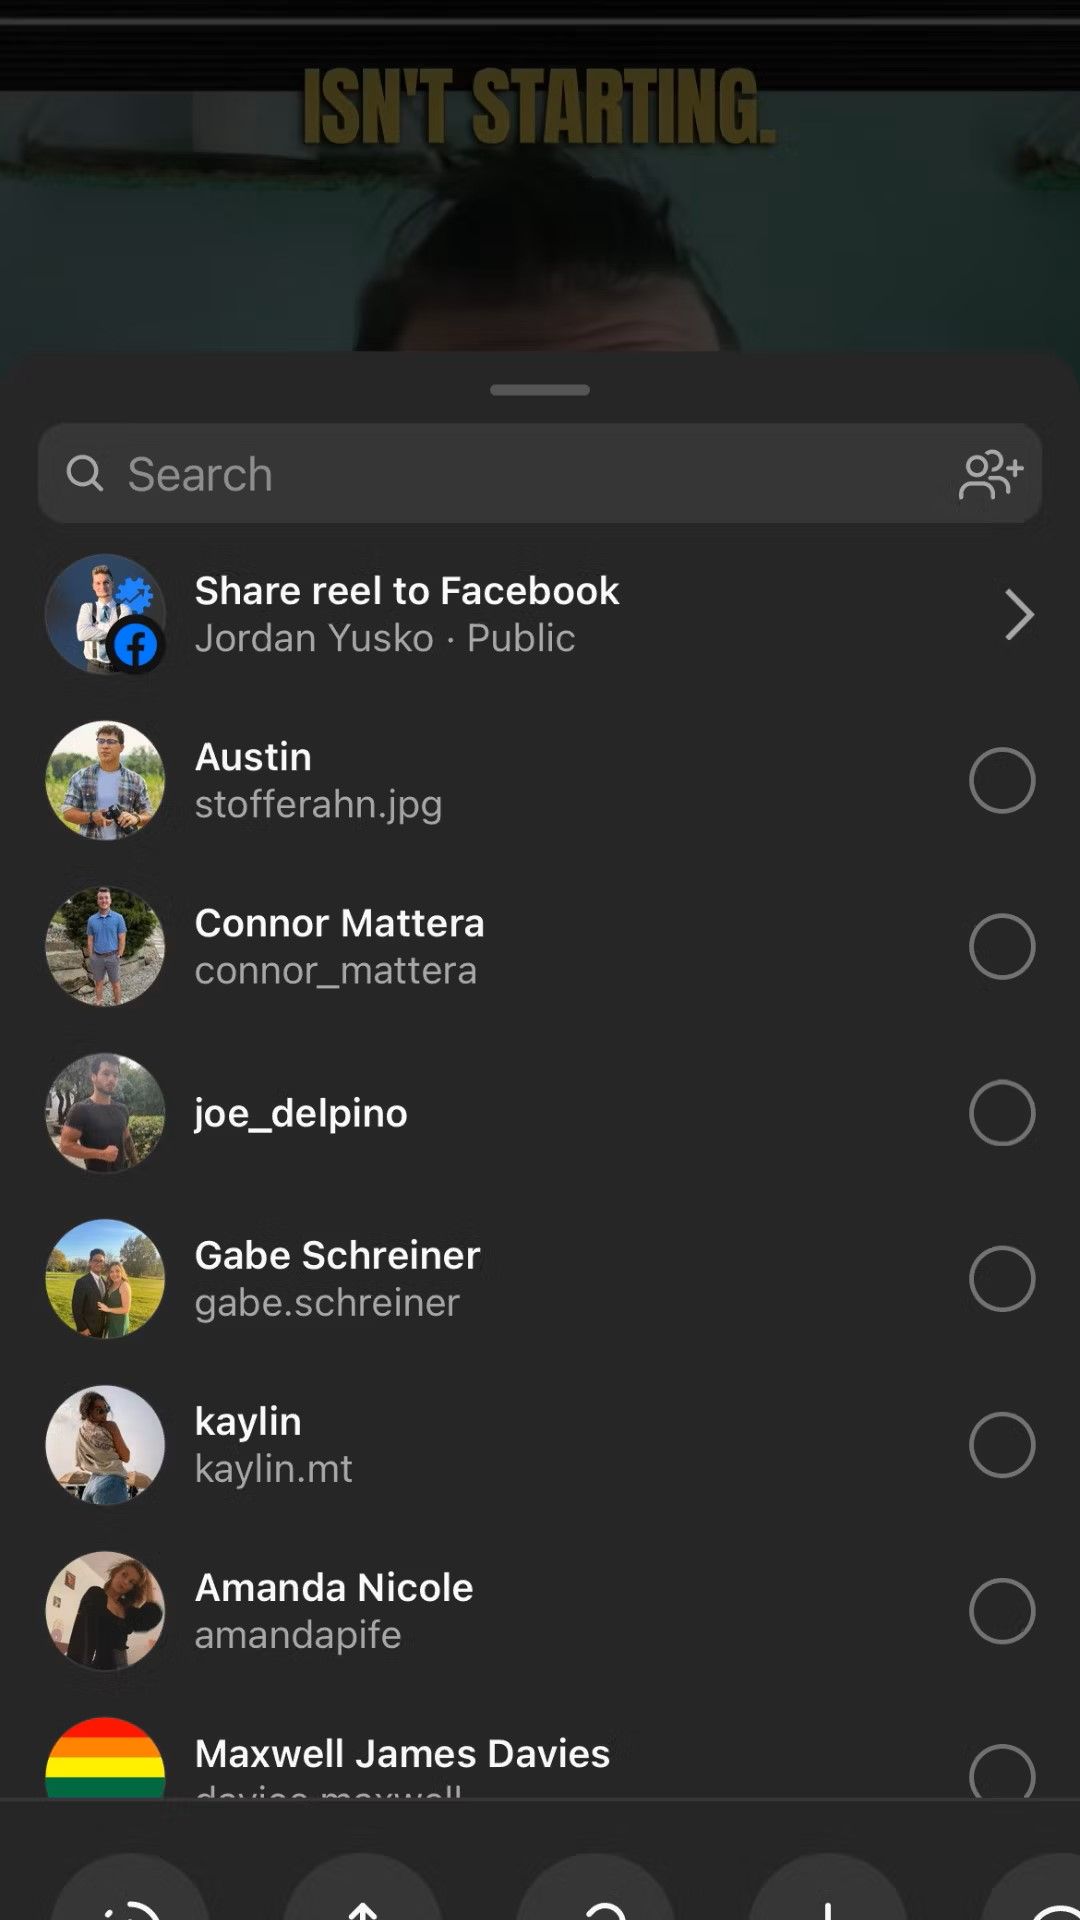
To share a Reel on Facebook after posting it on Instagram, use these steps:

Close
1. Open your desired Reel.
2. Tap theShare icon**.**
3. ToggleOn theShare to Facebook option.
4. TapShare .
Again, it’s important to note that your music selection will affect the availability of this option. From here, you also have the option to share your Reels to platforms beyond Facebook.
Making the Most of Your Reels
Whether you decide to do so before or after posting, sharing Reels has never been easier. By effectively sharing your Instagram Reels on Facebook, you’re not only expandin your reach but also capitalizing on the strengths of both platforms.
Instagram, with its visually driven content, and Facebook, with its massive global audience, can together enhance your content’s visibility. After all, if you’re putting time and effort into creating the Reels, you should make the most of your time.
- Title: Tutorial: Export Instagram Reels for Facebook Sharing
- Author: Michael
- Created at : 2024-07-29 07:29:42
- Updated at : 2024-07-30 07:29:42
- Link: https://facebook.techidaily.com/tutorial-export-instagram-reels-for-facebook-sharing/
- License: This work is licensed under CC BY-NC-SA 4.0.


 SwifDoo PDF 2-Year Plan
 PDF application, powered by AI-based OCR, for unified workflows with both digital and scanned documents.